This post may contain affiliate links. As an Amazon Associate, we earn from qualifying purchases. We only recommend products we trust.
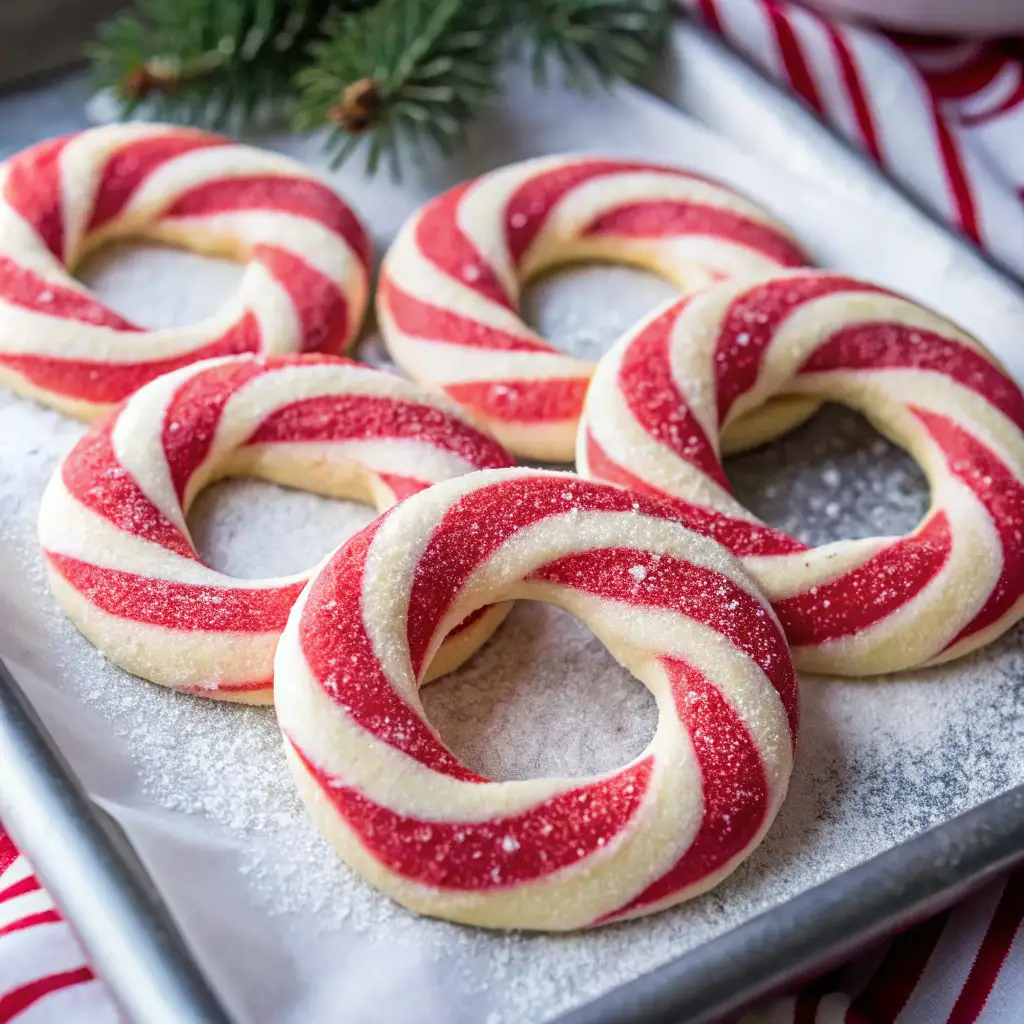
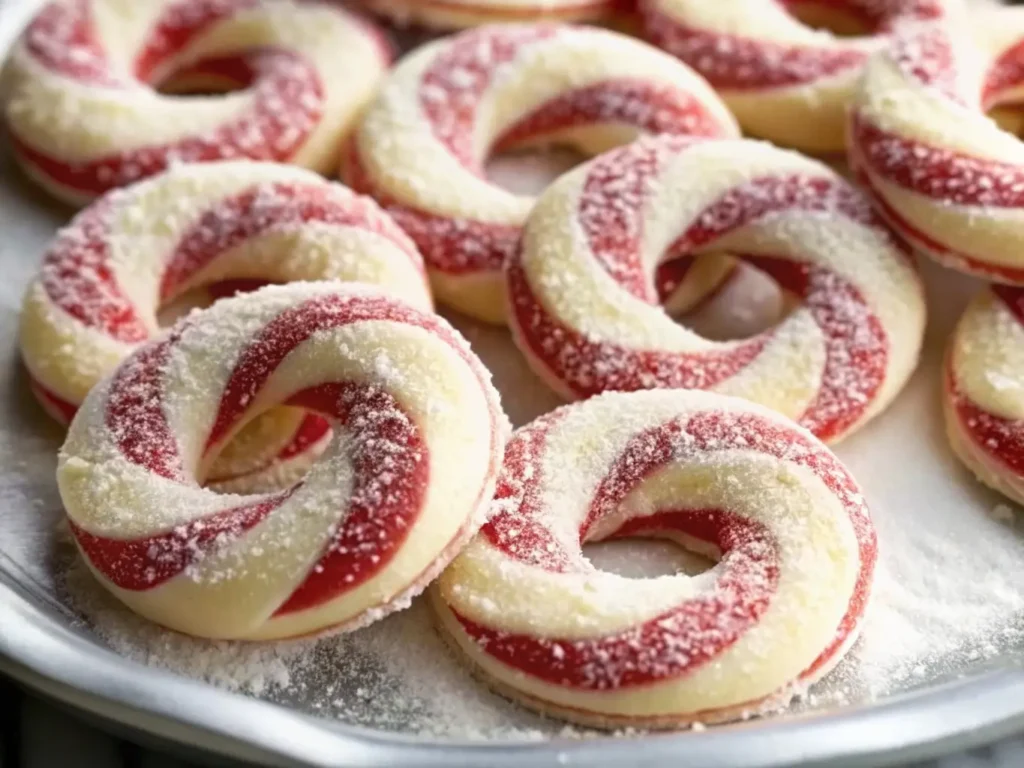
These candy cane cookies are festive holiday sugar cookies twisted into adorable red-and-white candy cane shapes with delicious peppermint flavor. Perfect for Christmas cookie exchanges, holiday baking, or gifting, these buttery cookies are fun to make with kids and melt in your mouth with just the right amount of mint. Ready in 30 minutes with simple ingredients, this classic Christmas cookie recipe creates about 36 cookies that look impressive but are surprisingly easy to make.
Prep Time: 20 minutes | Cook Time: 10 minutes | Total Time: 30 minutes | Yield: 36 cookies
Table of Contents
Why You’ll Love These Candy Cane Cookies
These candy cane cookies deliver nostalgia, flavor, and fun in every bite. The buttery vanilla dough combined with refreshing peppermint creates a perfect balance that’s not too minty or too sweet. They’re soft, tender, and have that melt-in-your-mouth texture from using powdered sugar instead of granulated. Best of all, shaping these cookies is a joyful activity that kids and adults alike will love—even if your candy canes turn out a little crooked, they’re charming and delicious!
What makes this recipe special:
- Fun to make with family and kids
- Beautiful red-and-white swirls
- Perfect peppermint flavor balance
- Soft, buttery texture
- Great for gifting and cookie exchanges
- Simple ingredients, impressive results
Ingredients for Candy Cane Cookies
- 1 cup unsalted butter, softened
- 1 cup powdered sugar
- 1 large egg, room temperature
- 1 teaspoon vanilla extract
- 1/2 teaspoon peppermint extract
- 2 1/2 cups all-purpose flour
- 1/2 teaspoon salt
- Red food coloring (gel preferred)
How to Make Candy Cane Cookies
Step 1: Preheat and Prepare
Preheat your oven to 375°F (190°C). Line two large baking sheets with parchment paper or silicone baking mats. Parchment paper is MVP for easy cleanup and prevents sticking.
Step 2: Cream Butter and Sugar
In a large mixing bowl or stand mixer, cream together the softened butter and powdered sugar on medium speed for 3-4 minutes until light and fluffy. This step is crucial—it builds air into the dough for tender cookies. Scrape down the sides of the bowl halfway through to ensure everything is incorporated.
Step 3: Add Wet Ingredients
Add the egg, vanilla extract, and peppermint extract to the butter mixture. Mix on medium speed until just combined and smooth. Don’t overbeat at this stage, as it can make the cookies tough. The mixture should be well blended with no streaks.
Step 4: Add Dry Ingredients
Gradually add the flour and salt to the wet ingredients, mixing on low speed to avoid a flour cloud. Mix just until the dough comes together. The dough should be soft but not sticky. If it’s too dry, add 1 teaspoon of milk. If too sticky, add flour 1 tablespoon at a time.
Step 5: Divide and Color the Dough
Divide the dough in half. Leave one half plain (white) and add red food coloring to the other half. Wear gloves to avoid staining your hands! Gel food coloring works best and requires 5-8 drops for vibrant color. Add slowly—you can always go darker. Knead the dough until the color is evenly distributed.
Step 6: Chill if Needed
If your dough is too soft to handle (especially on warm days), refrigerate both portions for 10 minutes. This makes rolling ropes much easier.
Step 7: Shape the Candy Canes
Take about 1 teaspoon of white dough and 1 teaspoon of red dough. Roll each into a 4-inch rope on a clean, unfloured surface. Place the two ropes side by side and twist them together gently, then curve the top to form a candy cane shape. Don’t twist too tightly or the colors will muddy together. Place on prepared baking sheets, spacing about 2 inches apart.
Step 8: Bake
Bake for 8-10 minutes, until the bottoms are lightly golden but the tops are still pale. These cookies continue to firm up as they cool, so don’t overbake or they’ll be crunchy instead of soft. Let cool on the baking sheet for 5 minutes before transferring to a wire rack.
Step 9: Cool and Serve
Transfer cooled cookies to a wire rack to cool completely. Once cool, they’re ready to eat, gift, or store!
Tips for Perfect Candy Cane Cookies
Use softened butter, not melted. Butter should be soft enough to indent with your finger but still hold its shape. This creates the right texture.
Use powdered sugar, not granulated. Powdered sugar creates a more tender, melt-in-your-mouth cookie than granulated sugar.
Room temperature egg blends better. Take your egg out of the fridge 30 minutes before baking for smoother incorporation.
Gel food coloring is best. Gel coloring is more concentrated and less watery than liquid, preventing color bleeding between red and white dough.
Don’t overtwist. Gentle twisting preserves distinct red and white stripes. Too much twisting creates a muddy pink color.
Chill dough if too soft. If your dough is difficult to roll or handle, refrigerate for 10 minutes to firm it up.
Watch the baking time closely. These cookies bake quickly. Remove when bottoms are just golden—they’ll firm up as they cool.
Let them cool on the pan. Cooling for 5 minutes on the baking sheet prevents breaking when transferring.
Recipe Variations
Chocolate candy canes: Add 2 tablespoons cocoa powder to half the dough instead of red coloring for chocolate-vanilla swirls.
Peppermint bark cookies: Dip cooled cookies halfway in melted dark chocolate and sprinkle with crushed candy canes.
Almond candy canes: Replace peppermint extract with almond extract and add 1/2 cup finely chopped maraschino cherries to the dough.
Gluten-free version: Use a 1:1 gluten-free flour blend plus 1/4 teaspoon xanthan gum if your blend doesn’t include it.
Vegan candy canes: Use vegan butter and replace the egg with a flax egg (1 tablespoon ground flaxseed mixed with 3 tablespoons water, let sit 5 minutes).
Extra minty: Increase peppermint extract to 3/4 teaspoon for more intense mint flavor.
Powdered sugar dusting: Lightly dust cooled cookies with powdered sugar for a snowy effect.
White chocolate dipped: Dip in melted white chocolate and immediately sprinkle with red and green sprinkles.
Storage Instructions
Room temperature: Store candy cane cookies in an airtight container at room temperature for up to 1 week. Place parchment paper between layers to prevent sticking.
Refrigerator: Not necessary unless your home is very warm. Can refrigerate for up to 2 weeks.
Freezer: Freeze baked cookies in an airtight container or freezer bag for up to 2 months. Thaw at room temperature before serving.
Unbaked dough: Freeze shaped, unbaked candy cane cookies on a baking sheet until solid, then transfer to a freezer bag for up to 3 months. Bake directly from frozen, adding 1-2 extra minutes to baking time.
Make-Ahead Instructions
Dough: Make dough up to 3 days ahead. Wrap tightly in plastic wrap and refrigerate. Let come to room temperature before shaping.
Shaped cookies: Shape candy canes and freeze unbaked for up to 3 months. Bake from frozen when needed.
Baked cookies: Bake up to 2 weeks ahead and store in airtight containers, or freeze for up to 2 months.
Serving Ideas
Holiday gift giving: Stack in clear mason jars, tie with festive ribbon, and add a handwritten tag.
Cookie platters: Arrange on vintage holiday trays or decorative plates for beautiful presentation.
With hot cocoa: Serve alongside mugs of hot chocolate—spike with peppermint schnapps for adults.
Cookie exchanges: Perfect for holiday cookie swaps—they travel well and look impressive.
Santa’s plate: Leave these on Santa’s cookie plate Christmas Eve—they might earn extra gifts!
Party dessert tables: Display on tiered stands dusted with powdered sugar for snowy effect.
Frequently Asked Questions
Why is my dough too crumbly? Add 1-2 teaspoons of milk or a splash of egg yolk. If overmixed, let the dough rest for 10 minutes to relax the gluten.
Why did my colors bleed together? Gel food coloring is less watery than liquid. If using liquid food coloring, blot the dough with a paper towel before shaping to remove excess moisture.
Can I make these ahead? Yes! Cookie dough keeps for 3 days refrigerated. Baked cookies freeze beautifully for 2 months.
What if I don’t have peppermint extract? You can use 1 teaspoon vanilla extract total and add 2 tablespoons finely crushed candy canes to the dough, though the peppermint flavor will be milder.
Can kids help make these? Absolutely! Kids love rolling and twisting the ropes. Embrace imperfect shapes—they’re charming and taste just as good!
How do I prevent the cookies from spreading? Make sure your butter is softened but not melted, and chill the dough if it’s too soft before shaping.
Can I use salted butter? Yes, but omit the 1/2 teaspoon salt from the recipe to avoid over-salting.
Why are my cookies hard instead of soft? Overbaking is the most common cause. Remove from oven when bottoms are just lightly golden—they’ll firm up as they cool.
Nutritional Information
Per cookie (based on 36 cookies)
- Calories: 110
- Protein: 1g
- Fat: 6g
- Carbohydrates: 13g
- Sugar: 6g
- Sodium: 45mg

Candy Cane Cookies Recipe – Easy Christmas Treats
Equipment
- Baking Sheets
- parchment paper or silicone mats
- Mixing bowls
- stand or hand mixer
- Measuring Cups and Spoons
- Rubber Spatula
- Wire Cooling Rack
Ingredients
- 1 cup unsalted butter, softened
- 1 cup powdered sugar
- 1 large egg, room temperature
- 1 tsp vanilla extract
- 0.5 tsp peppermint extract
- 2.5 cups all-purpose flour
- 0.5 tsp salt
- red food coloring (gel preferred)
Instructions
- Preheat oven to 375°F (190°C). Line two baking sheets with parchment paper or silicone mats.
- In a large bowl, beat softened butter and powdered sugar together until light and fluffy, about 3–4 minutes.
- Mix in egg, vanilla extract, and peppermint extract until smooth and combined. Avoid overbeating.
- Gradually mix in flour and salt until dough forms. If dry, add 1 tsp milk; if sticky, add a bit more flour.
- Divide dough in half. Tint one half red with gel food coloring and knead until evenly colored. Chill 10 minutes if too soft.
- Roll 1 tsp red and 1 tsp white dough into 4-inch ropes. Twist together gently and bend top into a cane shape. Place 2 inches apart on baking sheet.
- Bake 8–10 minutes until bottoms are lightly golden. Let cool on pan 5 minutes, then transfer to a wire rack to cool completely.
Notes
These candy cane cookies are more than just a festive treat—they’re a holiday tradition that brings joy to the baking process and smiles to everyone who tastes them. With their beautiful red-and-white swirls, buttery texture, and perfect hint of peppermint, these cookies are ideal for Christmas cookie exchanges, gift giving, or simply enjoying with your family while making sweet holiday memories. Whether your candy canes turn out perfectly shaped or charmingly crooked, they’ll be delicious and loved by all!
This post may contain affiliate links. As an Amazon Associate, we earn from qualifying purchases. We only recommend products we trust.