This post may contain affiliate links. As an Amazon Associate, we earn from qualifying purchases. We only recommend products we trust.
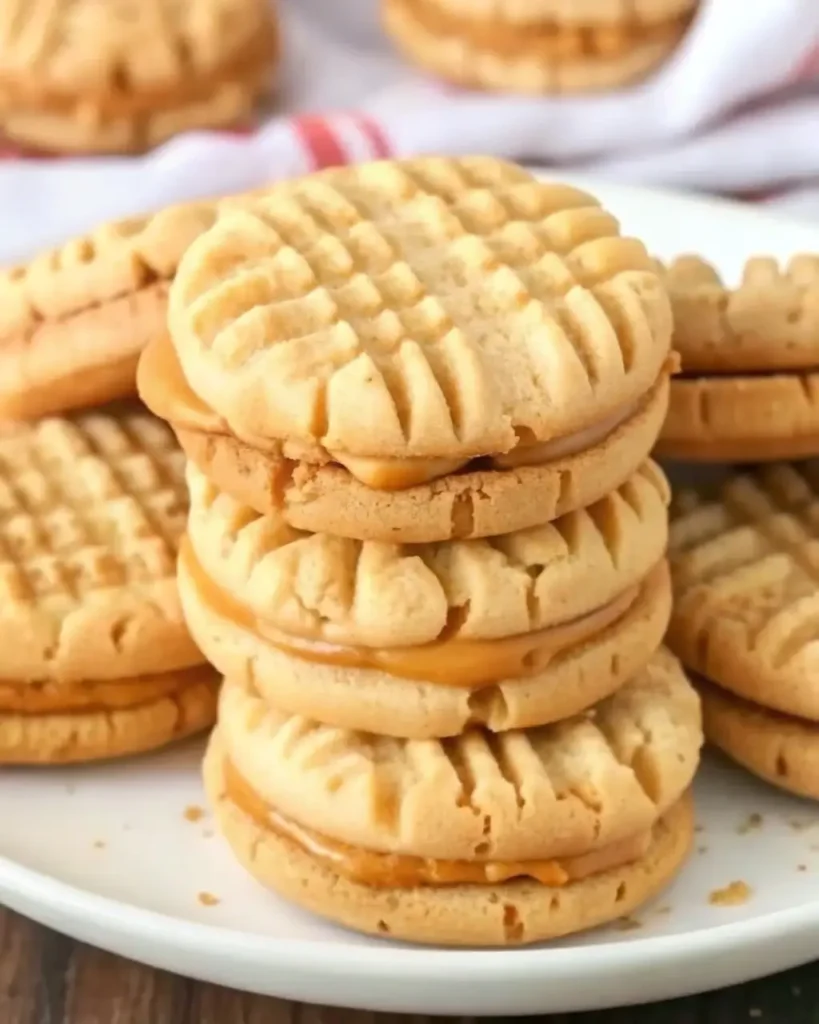
These homemade copycat Nutter Butter cookies are soft, chewy peanut butter sandwich cookies filled with creamy peanut butter frosting. Made from scratch with simple pantry staples, these nostalgic treats taste even better than the store-bought classic. With their iconic crosshatch pattern and sweet-salty flavor, these homemade peanut butter sandwich cookies are perfect for lunchboxes, parties, or satisfying your Nutter Butter cravings.
Prep Time: 20 minutes | Cook Time: 10 minutes | Total Time: 30 minutes | Yield: 12 sandwich cookies
Table of Contents
Why You’ll Love These Homemade Nutter Butters
These copycat Nutter Butter cookies deliver all the nostalgic joy of the classic snack with the fresh-baked advantage of homemade treats. The soft, tender peanut butter cookies have a light crisp edge and deep roasted peanut flavor that perfectly complements the smooth, creamy peanut butter filling. They’re kid-friendly, easy to make, and taste infinitely better than anything from a package.
What makes this recipe special:
- Softer and fresher than store-bought
- Rich, deep peanut butter flavor
- Creamy sweet-salty filling
- Simple pantry ingredients
- Ready in just 30 minutes
- Perfect for kids and adults alike
Ingredients for Copycat Nutter Butter Cookies
For the Peanut Butter Cookies:
- 1/2 cup unsalted butter, softened
- 1/2 cup creamy peanut butter
- 1/2 cup granulated sugar (plus extra for topping)
- 1/2 cup brown sugar
- 1 large egg
- 1 teaspoon vanilla extract
- 1 1/4 cups all-purpose flour
- 3/4 teaspoon baking soda
- 1/4 teaspoon salt
For the Peanut Butter Filling:
- 1/2 cup creamy peanut butter
- 1/4 cup unsalted butter, softened
- 1 cup powdered sugar
- 1 teaspoon vanilla extract
- 1-2 tablespoons milk (as needed for texture)
How to Make Homemade Nutter Butter Cookies
Step 1: Prepare for Baking
Preheat your oven to 350°F (175°C). Line a baking sheet with parchment paper or a silicone baking mat to prevent sticking.
Step 2: Cream the Butter and Sugars
In a large mixing bowl, cream together the softened butter, creamy peanut butter, granulated sugar, and brown sugar using a hand mixer or stand mixer. Beat on medium speed for 2-3 minutes until light and fluffy. The mixture should be pale and airy.
Step 3: Add Wet Ingredients
Add the egg and vanilla extract to the butter mixture. Mix on medium speed until fully incorporated and smooth, scraping down the sides of the bowl as needed.
Step 4: Combine Dry Ingredients
In a separate bowl, whisk together the flour, baking soda, and salt. This ensures even distribution of the leavening agent and prevents clumps.
Step 5: Make the Cookie Dough
Gradually add the dry ingredients to the wet mixture, mixing on low speed just until a soft dough forms. Don’t overmix, as this can make the cookies tough.
Step 6: Shape the Cookies
Roll the dough into 1-inch balls (about 1 tablespoon of dough each). Gently shape each ball into an oval to mimic the classic Nutter Butter shape. Place the ovals on the prepared baking sheet, spacing them about 2 inches apart.
Step 7: Create the Crosshatch Pattern
Using a fork, press down on each cookie oval to create the iconic crisscross pattern. Press once horizontally, then once vertically. Lightly sprinkle the tops with granulated sugar for extra sweetness and crunch.
Step 8: Bake the Cookies
Bake for 8-10 minutes, or until the cookies are just golden around the edges. The centers will look slightly underdone—this is perfect! Do not overbake, as the cookies will firm up as they cool. Overbaking results in hard, crunchy cookies instead of soft ones.
Step 9: Cool the Cookies
Let the cookies cool on the baking sheet for 5 minutes, then transfer to a wire rack to cool completely. This is crucial—warm cookies will melt the filling.
Step 10: Make the Peanut Butter Filling
In a medium bowl, beat together the peanut butter and softened butter until smooth and creamy. Add the powdered sugar and vanilla extract, mixing until well combined. The mixture will be thick. Add milk 1 tablespoon at a time, mixing between additions, until the filling reaches a spreadable or pipeable consistency.
Step 11: Assemble the Sandwich Cookies
Once the cookies are completely cool, spread or pipe about 1-2 tablespoons of filling onto the flat side of one cookie. Top with another cookie, flat side down, to create a sandwich. Press gently so the filling spreads to the edges. Repeat with the remaining cookies and filling.
Step 12: Set and Serve
Let the assembled sandwich cookies sit for 10-15 minutes to allow the filling to set slightly before serving.
Tips for Perfect Copycat Nutter Butters
Use regular creamy peanut butter. Avoid natural peanut butter, which can be too oily and affect the texture of both cookies and filling. Brands like Jif or Skippy work best.
Don’t overbake. Remove the cookies when they’re just golden around the edges. They’ll continue to firm up as they cool, resulting in soft, chewy cookies.
Let cookies cool completely. Warm cookies will melt the filling. Be patient and wait for them to cool entirely before assembling.
Adjust filling consistency. Add milk gradually until you achieve the perfect spreadable texture. Too thick won’t spread; too thin won’t stay put.
Store with care. Keep sandwich cookies in an airtight container with parchment between layers to prevent sticking.
Chill dough if needed. If your kitchen is warm and the dough is very soft, refrigerate for 15-20 minutes before shaping.
Use a piping bag for neatness. For professional-looking cookies, pipe the filling using a piping bag or a plastic bag with the corner snipped off.
Storage Instructions
Room temperature: Store assembled sandwich cookies in an airtight container at room temperature for up to 5 days. Add a slice of bread to the container to help maintain softness.
Refrigerator: For longer storage, refrigerate in an airtight container for up to 10 days. Let come to room temperature before serving for best flavor.
Freezer: Freeze assembled cookies in a single layer on a baking sheet until solid, then transfer to a freezer bag or airtight container for up to 2 months. Thaw at room temperature before serving.
Unbaked dough: Shape cookies and freeze unbaked on a tray until solid. Store in a freezer bag for up to 2 months. Bake directly from frozen, adding 1-2 minutes to the baking time.
Filling only: Make the filling ahead and refrigerate in an airtight container for up to 3 days. Bring to room temperature before using for easier spreading.
Recipe Variations
Crunchy Nutter Butters: Use crunchy peanut butter in both the cookies and filling for added texture and peanut chunks.
Chocolate-dipped version: Dip half of each assembled sandwich cookie in melted chocolate and let set on parchment paper for a decadent finish.
Mini cookies: Make smaller 1/2-inch balls for bite-sized mini sandwich cookies perfect for parties or lunchboxes.
Honey peanut butter twist: Add 1 teaspoon honey to the filling for a touch of floral sweetness and deeper flavor.
Chocolate filling: Replace peanut butter in the filling with Nutella or chocolate hazelnut spread for chocolate-peanut butter cookies.
Nut-free alternative: Substitute sunflower seed butter for peanut butter to make school-safe, nut-free cookies.
Gluten-free version: Use a 1:1 gluten-free flour blend in place of all-purpose flour for gluten-free Nutter Butters.
Extra crispy cookies: Flatten the dough more before baking and extend baking time by 1-2 minutes for crunchier cookies.
Frequently Asked Questions
Can I use natural peanut butter? It’s best to use regular creamy peanut butter (like Jif or Skippy) for consistent texture. Natural peanut butter is too oily and can affect the cookie structure and filling consistency.
How do I keep the cookies soft? Avoid overbaking and store in an airtight container. Adding a slice of bread to the container helps retain moisture and keeps cookies soft.
Can I make the filling in advance? Yes! Make the filling up to 3 days ahead and store refrigerated. Bring to room temperature and re-whip slightly before using.
Can I freeze the cookie dough? Absolutely! Shape the cookies and freeze unbaked on a tray. Once solid, store in a freezer bag for up to 2 months. Bake directly from frozen, adding 1-2 extra minutes to the baking time.
What can I use instead of a piping bag? Use a small spoon to spread the filling, or use a plastic sandwich bag with the tip snipped off as a makeshift piping bag.
Can I use a cookie cutter to shape them? Yes! Roll the dough slightly thicker and use an oval cutter for uniform shapes. Chill the cut cookies briefly before baking to help them maintain their shape.
Do I need to chill the dough? Chilling isn’t necessary unless your dough is very soft. If it’s difficult to shape, refrigerate for 15-20 minutes.
Can I double the recipe? Yes! This recipe doubles well if you need a larger batch for events or gifting.
Why did my cookies spread too much? This can happen if the butter was too soft or melted. Make sure butter is softened but not melted, and try chilling the dough briefly before baking.
Can I make the cookies flatter or crisper? Flatten the dough more with the fork and extend the baking time by 1-2 minutes for a crispier texture like store-bought Nutter Butters.
Serving Suggestions
These homemade Nutter Butter cookies are perfect for:
- After-school snacks with cold milk
- Lunchbox treats
- Cookie platters and dessert tables
- Birthday parties and celebrations
- Homemade gift boxes
- Movie night snacks
- Ice cream sandwiches (use them in place of cookies)
Nutritional Information
Per sandwich cookie
- Calories: 280
- Protein: 5g
- Fat: 18g (Saturated: 7g)
- Carbohydrates: 28g
- Fiber: 1g
- Sugar: 20g
- Sodium: 140mg
- Cholesterol: 35mg
These homemade copycat Nutter Butter cookies are the perfect blend of sweet and salty, soft and creamy, familiar and fresh. With their deep peanut butter flavor, tender texture, and smooth filling, these sandwich cookies offer a made-from-scratch take on a beloved classic. Whether you’re making them for nostalgic adults or peanut butter-loving kids, these easy cookies bring homemade comfort with every bite. Once you try this recipe, you’ll never want the store-bought version again!
Homemade Nutter Butter Cookies
Ingredients
- 1/2 cup unsalted butter, softened
- 1/2 cup creamy peanut butter
- 1/2 cup granulated sugar (plus extra for topping)
- 1/2 cup brown sugar
- 1 large egg
- 1 teaspoon vanilla extract
- 1 1/4 cups all-purpose flour
- 3/4 teaspoon baking soda
- 1/4 teaspoon salt
- 1/2 cup creamy peanut butter (for filling)
- 1/4 cup unsalted butter, softened (for filling)
- 1 cup powdered sugar
- 1 teaspoon vanilla extract (for filling)
- 1-2 tablespoons milk, as needed for texture
Instructions
- Preheat oven to 350°F (175°C). Line baking sheets with parchment paper or silicone mats.
- In a large bowl, beat softened butter, peanut butter, granulated sugar, and brown sugar for 2–3 minutes until light and fluffy.
- Beat in egg and vanilla until fully incorporated.
- In a separate bowl, whisk flour, baking soda, and salt together. Gradually add to the wet mixture on low speed until combined.
- Roll dough into 1-inch balls and shape into ovals. Place 2 inches apart. Press with a fork to create the classic crosshatch pattern. Sprinkle lightly with sugar.
- Bake 8–10 minutes until edges are lightly golden. Centers should look slightly soft. Cool 5 minutes on sheet, then transfer to rack to cool completely.
- Beat together peanut butter and butter until creamy. Add powdered sugar and vanilla, mixing until thick. Add milk 1 tablespoon at a time until spreadable consistency forms.
- Spread or pipe about 1–2 tablespoons filling onto flat side of one cookie. Top with another cookie, pressing gently. Let set 10–15 minutes before serving.