This post may contain affiliate links. As an Amazon Associate, we earn from qualifying purchases. We only recommend products we trust.
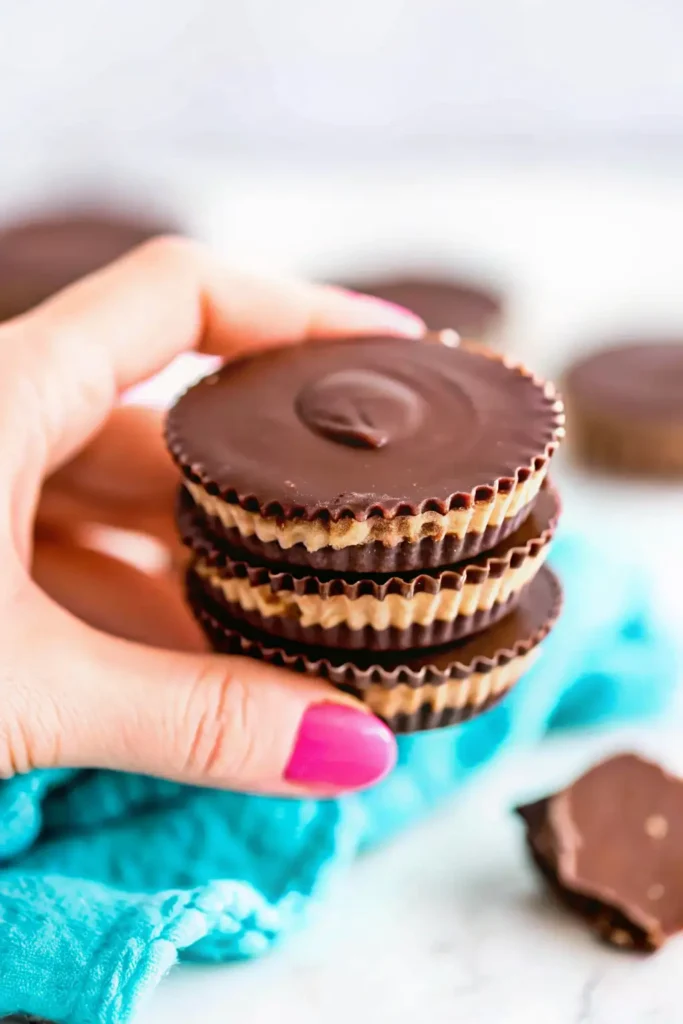
If you are looking for a way to satisfy your chocolate-peanut butter cravings without any of the preservatives found in packaged candy, these Homemade Peanut Butter Cups are the ultimate solution. This recipe is an identical copycat of the classic Reese’s cup, featuring a snappy chocolate shell and a perfectly smooth, slightly sweet peanut butter center. With just four simple ingredients and no baking required, you can create a batch of professional-quality candies in your own kitchen.
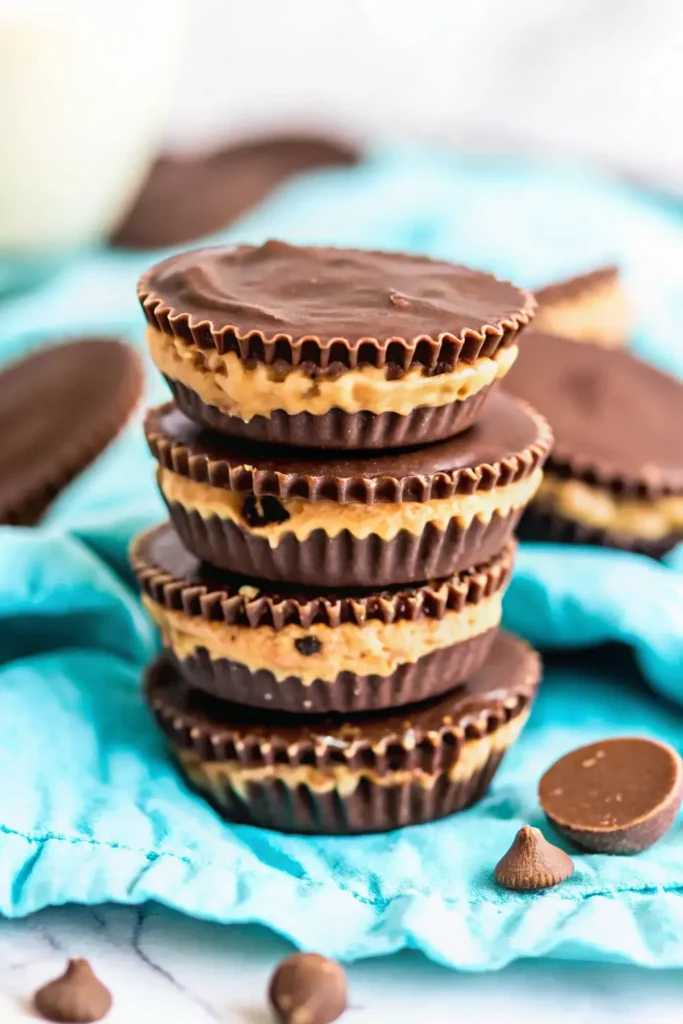
The beauty of these homemade Reese’s cups is the texture. By using melting wafers instead of standard chocolate chips, you achieve a smooth finish and a satisfying “snap” when you bite into them. They are the perfect high-impact treat for holiday platters, party favors, or simply keeping a “secret stash” in your freezer for late-night cravings.
Table of Contents
Why You’ll Love This Recipe
- Identical Taste: Captures the exact salty-sweet ratio of the original candy.
- Only 4 Ingredients: Simple, pantry-friendly staples with no complex steps.
- No-Bake & Easy: Perfect for kids to help with and great for hot weather.
- Better Ingredients: No stabilizers or preservatives—just pure chocolate and peanut butter bliss.
Ingredients
- 2 ½ cups Chocolate Melting Wafers (Ghirardelli recommended)
- 1 cup Creamy Peanut Butter (shelf-stable, not natural)
- ⅓ cup Powdered Sugar
- 1 tsp Vanilla Extract
Instructions
1. Prep the Liners
Line a standard muffin tin with 12 paper liners. For bite-sized treats, you can use a mini-muffin pan with mini liners (this will yield approximately 24–30 mini cups).
2. Create the Chocolate Base
Melt the chocolate wafers in a microwave-safe bowl in 30-second intervals, stirring between each one until completely smooth. Spoon about two teaspoons of melted chocolate into the bottom of each liner. Tap the pan gently on the counter to smooth the chocolate into an even layer.
3. Make the Filling
In a medium bowl, combine the creamy peanut butter, powdered sugar, and vanilla extract. Stir together until the mixture is creamy and smooth. For the best presentation, transfer this mixture to a pastry bag or a Ziploc bag with the corner snipped off.
4. Layer the Peanut Butter
Pipe a dollop of the peanut butter mixture into the center of each chocolate-lined cup. You want enough to be flavorful but leave a small gap around the edges so the top chocolate layer can seal the cup.
5. Top and Seal
Spoon approximately one tablespoon of the remaining melted chocolate over each peanut butter center. Use the back of the spoon to spread the chocolate to the edges, ensuring the peanut butter is fully enclosed.
6. Chill and Set
Place the pan in the refrigerator for at least one hour to allow the chocolate to fully set and the centers to firm up. Peel off the paper wrappers and serve!

Expert Tips for Success
- Choose the Right Peanut Butter: Use standard, shelf-stable creamy peanut butter (like Jif or Skippy). Natural peanut butters where the oil separates can result in a greasy or grainy texture that won’t set correctly.
- The Melting Wafer Advantage: While chocolate chips can work, melting wafers (like Ghirardelli) are formulated to melt smoothly and harden with a glossy finish without needing complex tempering.
- Smooth the Tops: After adding the final layer of chocolate, tap the entire muffin tin firmly on the counter a few times. This releases air bubbles and creates a perfectly flat, professional-looking top.
- Piping is Easier: Using a bag to pipe the filling is much faster and cleaner than using a spoon, ensuring your layers stay distinct and beautiful.
Variations
- Mini-Bite Size: Use a mini-muffin pan. Use one teaspoon of chocolate for the bottom and two teaspoons for the top.
- Nut Butter Swaps: Replace peanut butter with almond butter or sunflower seed butter (for a nut-free option) using the same ratios.
- Festive Toppings: Before the top chocolate layer sets, add seasonal sprinkles, a pinch of sea salt, or a drizzle of white chocolate.
- Dark or White Chocolate: Swap the milk chocolate wafers for dark or white chocolate wafers to change the flavor profile entirely.
FAQ: Homemade Peanut Butter Cups
Q: Can I use chocolate chips instead of wafers? A: Yes, but the chocolate will be slightly harder to bite into once set. If using chips, adding a teaspoon of coconut oil can help soften the texture.
Q: Why is my peanut butter filling runny? A: This usually happens if you use natural peanut butter. If your filling is too soft, add another tablespoon of powdered sugar to thicken it.
Q: How do I store these? A: Store in an airtight container in the refrigerator for up to 2 weeks. For longer storage, they can be frozen for up to 6 months in a freezer-safe bag.
Q: Do I need to keep them refrigerated? A: While they can sit out at room temperature for a party, they are best stored in the fridge to maintain their perfect “snap” and prevent melting.

Homemade Peanut Butter Cups
Equipment
- Mini muffin tin
- paper liners
- Microwave-safe bowl
- Spoon or Spatula
Ingredients
- 1 1/2 cups chocolate chips (dark or milk)
- 1 Tbsp coconut oil
- 1/2 cup creamy peanut butter
- 2–3 Tbsp powdered sugar or maple syrup
- 1 Tbsp coconut flour or almond flour (optional)
- 1 pinch sea salt
Instructions
- Line a mini muffin tin with paper liners. This recipe yields approximately 10–12 mini peanut butter cups.
- Combine the chocolate chips and coconut oil in a microwave-safe bowl. Microwave in 30-second intervals, stirring between each, until fully melted and smooth. Spoon 1–2 teaspoons of chocolate into each liner, spreading slightly up the sides. Freeze for 5–10 minutes until set.
- In a small bowl, stir together the peanut butter, powdered sugar (or maple syrup), sea salt, and optional flour until thick and smooth.
- Add about 1 teaspoon of the peanut butter mixture to each chilled chocolate base. Gently press to flatten, leaving space around the edges.
- Spoon the remaining melted chocolate over the peanut butter centers, fully covering them. Tap the pan gently on the counter to smooth the tops.
- Freeze for 15–20 minutes or refrigerate for 30 minutes until firm. Remove liners and serve.