This post may contain affiliate links. As an Amazon Associate, we earn from qualifying purchases. We only recommend products we trust.
If you are looking for a dessert that balances childhood nostalgia with professional, “bistro-style” execution, these Homemade Peanut Butter Eggs are a masterclass in confectionary perfection. This recipe takes the iconic combination of creamy peanut butter and rich chocolate and elevates it using “Alice-approved” techniques to ensure a smooth, melt-in-your-mouth interior and a crisp, snap-perfect chocolate shell.
As a former chef, I’ve found that the secret to a world-class peanut butter filling isn’t just sugar—it’s the salt balance and the texture. By using a specific ratio of creamy peanut butter to powdered sugar, we create a truffle-like consistency that is far superior to anything you’ll find in a store-bought wrapper. Whether you are prepping for a seasonal celebration or looking for a “high-intent” digital product idea, these treats deliver a professional finish that your audience will absolutely adore.
Table of Contents
Why This is a 2026 Seasonal Staple
- The “Alice-Approved” Snap: Uses a refined dipping method to achieve a professional, bakery-style chocolate coating.
- Better-Than-Store-Bought: Control over the quality of the chocolate and the saltiness of the peanut butter makes this a gourmet upgrade.
- High-Intent Potential: Captures massive search volume for “Homemade Candy” and “Peanut Butter Desserts” during peak seasonal windows.
- Customizable Presentation: The simple egg shape serves as a perfect canvas for “bistro-style” decorations, from sea salt sprinkles to white chocolate drizzles.
- Scale-Ready: This recipe is easy to double or triple, making it perfect for gifting or large gatherings.
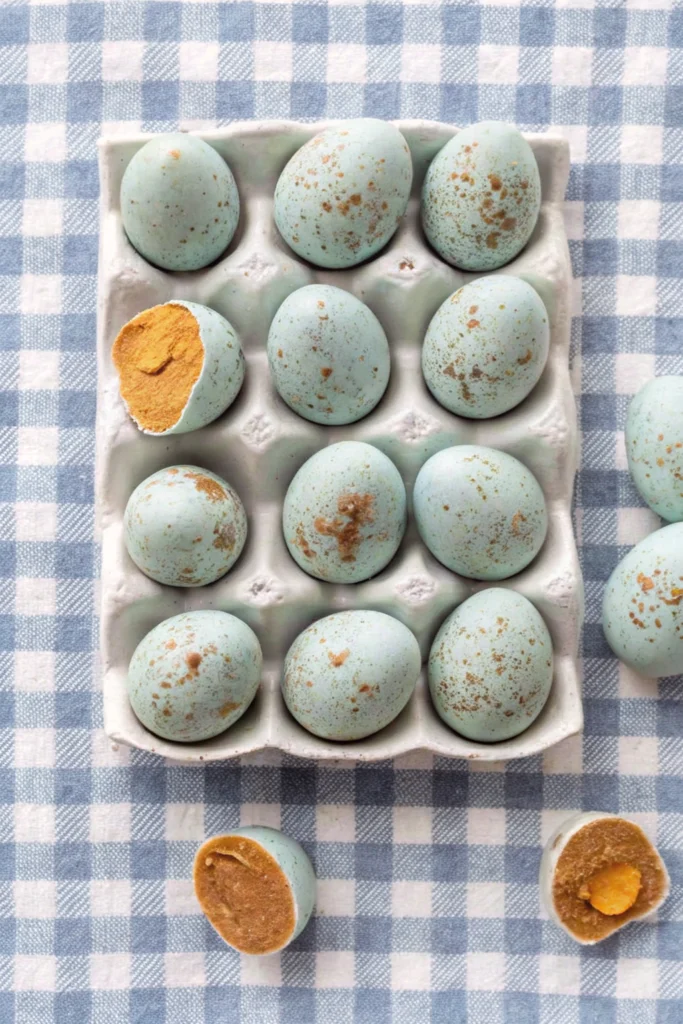
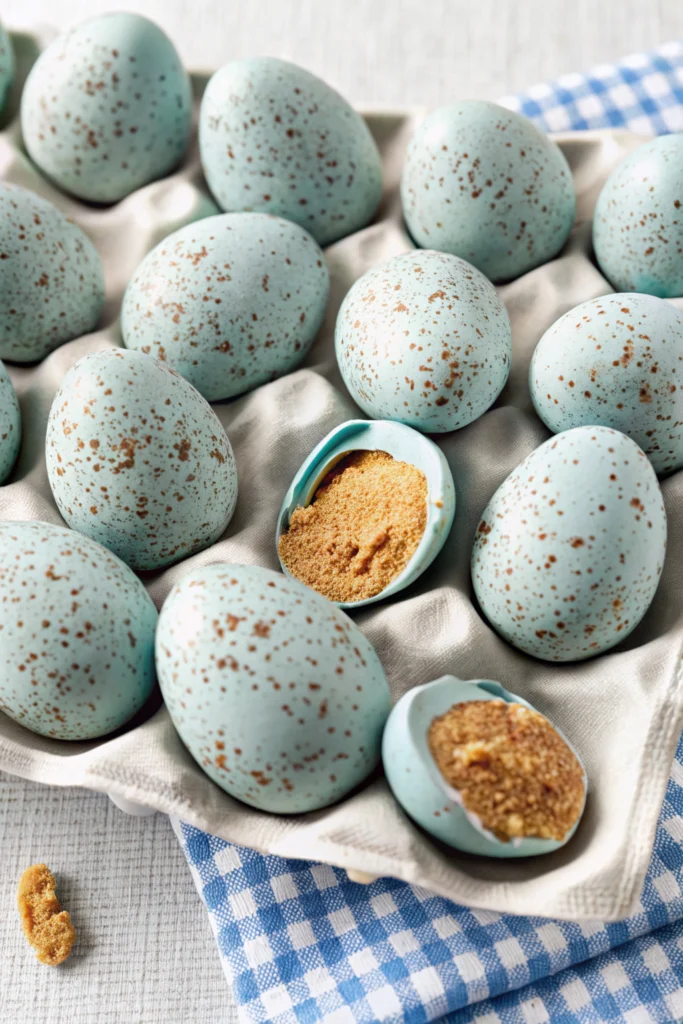
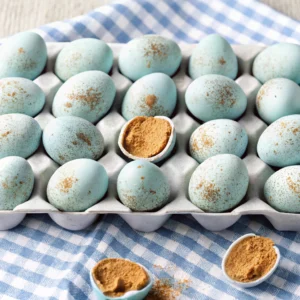
What is a Homemade Peanut Butter Egg?
Unlike a standard peanut butter cup, the peanut butter egg features a higher ratio of filling to chocolate and a distinctively soft, fudge-like center. In a professional kitchen, we refer to this as a peanut butter fondant. By adding a small amount of melted butter to the mix, we ensure the center stays “Alice-approved” creamy even after the chocolate has set.
Ingredients List
The Creamy Center:
- 1 cup Creamy Peanut Butter: Use a high-quality, stabilized brand for the best “bistro-style” texture.
- 1/4 cup Unsalted Butter: Softened to room temperature.
- 2 cups Powdered Sugar: Sifted to ensure a silky, lump-free filling.
- 1/2 tsp Salt: Essential to cut through the sweetness.
- 1 tsp Vanilla Extract: For a professional, aromatic depth.
The Chocolate Shell:
- 2 cups Semisweet Chocolate Chips: Or high-quality couverture chocolate for a better “chef-style” melt.
- 1 tbsp Coconut Oil: This is the “Alice-approved” secret for a smooth, shiny coating that doesn’t crack when you bite into it.
Step-by-Step Instructions
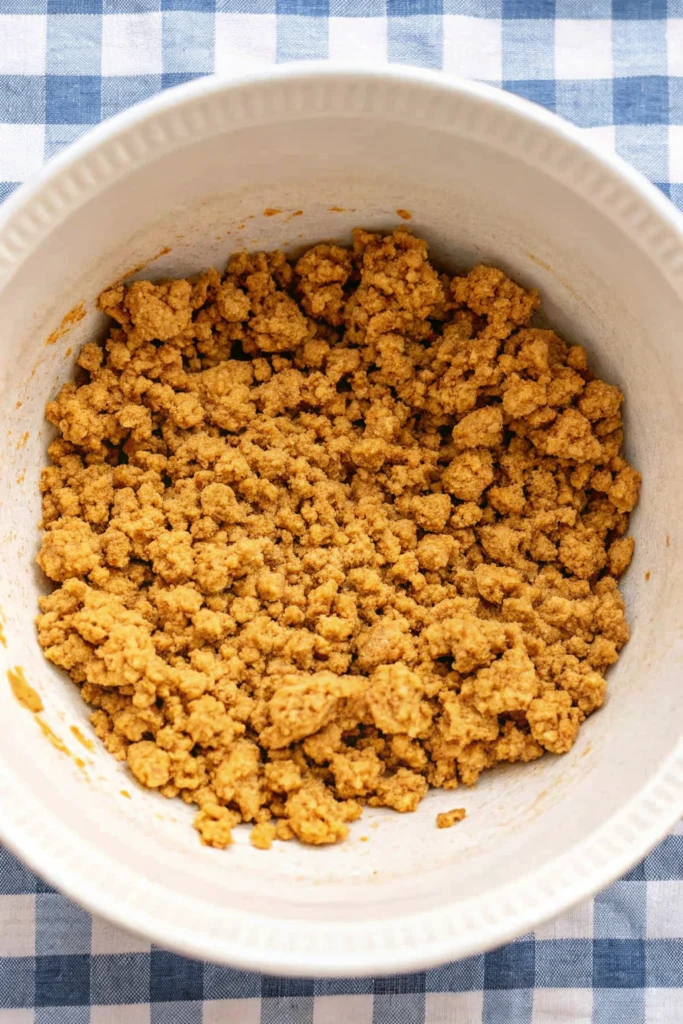
- The Base: In a large bowl, cream together the peanut butter, softened butter, vanilla, and salt until smooth.
- The Sweetener: Gradually add the powdered sugar one cup at a time. The mixture should become a thick, pliable dough. If it’s too sticky to handle, add an extra tablespoon of sugar.
- The Shaping: Line a baking sheet with parchment paper. Scoop about 2 tablespoons of the mixture and shape it into an “egg” by hand, or roll it into a ball and flatten it slightly into an oval.
- The “Chef-Style” Chill: Place the shaped eggs in the freezer for at least 30 minutes. This is a non-negotiable “Alice-approved” step; if the centers are warm, they will melt into the chocolate during dipping.
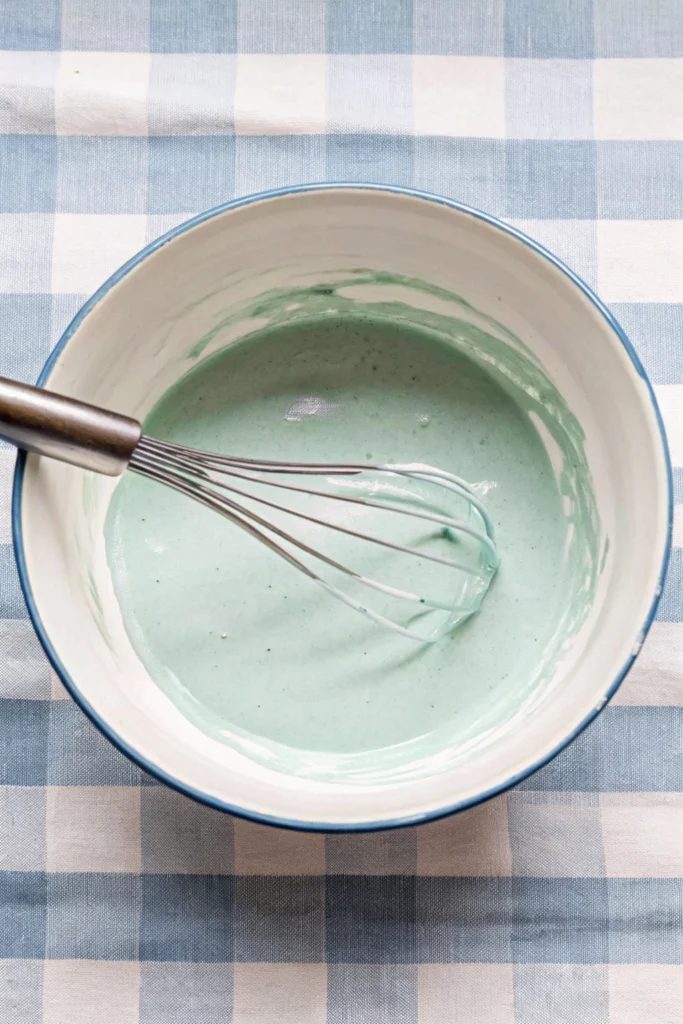
- The Chocolate: Melt the chocolate chips and coconut oil in 30-second intervals in the microwave, stirring until completely smooth.
- The Dipping: Using a fork, submerge each chilled egg into the chocolate. Lift it out, tap the fork on the side of the bowl to remove excess chocolate, and slide it back onto the parchment paper.
- The Finish: While the chocolate is still wet, you can add a “bistro-style” pinch of flaky sea salt or a decorative drizzle.
- The Set: Let the eggs sit at room temperature or in the fridge until the chocolate is completely firm.
The Science: The Role of Coconut Oil in Coating
In a professional pastry kitchen, we often add a small amount of fat (like coconut oil) to dipping chocolate. This lowers the viscosity of the chocolate, allowing it to flow more easily and create a thinner, more even “Alice-approved” coating. Additionally, the oil prevents the chocolate from becoming too brittle, giving you that perfect “bistro-style” snap without the shell shattering everywhere.
Expert Tips
- Use a Fork for Dipping: To get a professional finish, use a dipping tool or a fork. Never use your fingers, or you’ll leave marks on the “Alice-approved” shell.
- The “Blot” Secret: If your peanut butter is very oily, blot the shaped eggs with a paper towel before freezing to ensure the chocolate adheres perfectly.
- Sift Your Sugar: Don’t skip sifting the powdered sugar. Even small lumps will be noticeable in the smooth peanut butter center.
Storage Info
- To Store: These are best kept in an airtight container in the refrigerator for up to 2 weeks.
- At Room Temperature: They can sit out for serving for a few hours, but they will soften up in warm environments.
- Freezing: These freeze beautifully for up to 3 months. In fact, many “bistro-style” fans prefer eating them straight from the freezer!
Frequently Asked Questions
Q: Can I use “natural” peanut butter? A: For this specific recipe, I recommend a standard creamy peanut butter. Natural varieties that require stirring can be too oily, making the “Alice-approved” centers difficult to shape and dip.
Q: Why did my chocolate seize? A: Chocolate seizes when even a tiny drop of water gets into it. Ensure your bowls and utensils are bone-dry before melting the chocolate.
Q: Can I make these vegan? A: Yes! Use a vegan butter substitute and dairy-free chocolate chips. The results remain wonderfully “bistro-style.”
Q: Do I have to use a microwave for the chocolate? A: Not at all. You can use a double boiler (a bowl over a pot of simmering water) for more control over the “chef-style” tempering process.
Q: My peanut butter dough is too crumbly—help! A: If the dough is too dry, add a teaspoon of melted butter or an extra teaspoon of peanut butter until it holds its shape.
Chocolate Peanut Butter Eggs
Equipment
- Mixing bowls
- Baking sheet
- Parchment paper
- Fork (for dipping)
Ingredients
- 1 cup creamy peanut butter
- 1/4 cup unsalted butter, softened
- 2 cups powdered sugar, sifted
- 1/2 tsp salt
- 1 tsp vanilla extract
- 2 cups semisweet chocolate chips
- 1 tbsp coconut oil
Instructions
- In a mixing bowl, combine peanut butter, softened butter, salt, and vanilla extract until smooth and creamy.
- Gradually add powdered sugar, mixing until a thick dough forms.
- Scoop 2-tablespoon portions and shape into egg forms. Place on a parchment-lined baking sheet.
- Freeze the shaped eggs for 30 minutes until very firm.
- Melt chocolate chips and coconut oil together until smooth and glossy.
- Using a fork, dip each peanut butter egg into the melted chocolate, tapping off excess before placing back on the tray.
- Refrigerate for about 15 minutes until the chocolate is fully set.