This post may contain affiliate links. As an Amazon Associate, we earn from qualifying purchases. We only recommend products we trust.
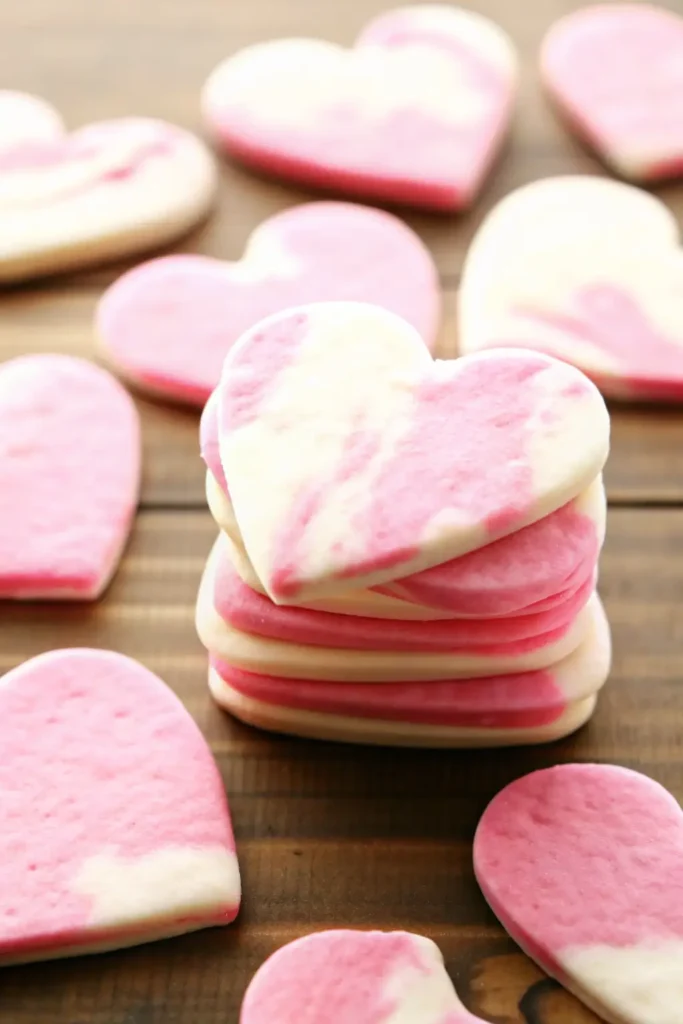
Elevate your Valentine’s Day baking with these show-stopping Marbled Pink Sugar Cookies that look like edible watercolor art. This foolproof no-spread sugar cookie recipe features a classic buttery dough divided and tinted pink, then gently swirled to create stunning marbled patterns in every heart-shaped cookie. The beautiful pink and white swirls are baked right into the dough—no royal icing skills required!

Unlike traditional decorated sugar cookies, these marbled beauties showcase their artful design through a simple color-swirling technique that’s surprisingly easy to master. Each cookie features unique, one-of-a-kind patterns that make them look professionally crafted while maintaining perfectly sharp edges. These eye-catching treats are ideal for Valentine’s Day cookie exchanges, romantic gifts, or simply impressing your loved ones with bakery-quality cookies made at home.
Table of Contents
Why These Marbled Valentine Cookies Are Special
Gallery-Worthy Appearance: The gentle swirling technique creates beautiful, watercolor-like patterns that make each cookie a unique work of edible art.
Guaranteed Shape Retention: This specially formulated dough holds crisp, clean edges without spreading, ensuring your heart shapes stay picture-perfect.
Creative & Fun Process: Tinting and marbling the dough transforms cookie-making into an enjoyable, hands-on craft activity perfect for all skill levels.
Timeless Buttery Flavor: A classic vanilla sugar cookie base delivers rich, buttery taste that complements the stunning visual presentation.
Ingredients for Marbled Valentine Sugar Cookies
- ½ cup (1 stick) unsalted butter, softened
- ½ cup granulated sugar
- 1 large egg, room temperature
- 1½ teaspoons vanilla extract
- ¼ teaspoon salt
- ½ teaspoon baking powder
- 2 cups all-purpose flour
- Pink or red gel food coloring
How to Make Marbled Pink Sugar Cookies
Step 1: Make the Base Dough
In a large mixing bowl or stand mixer, cream softened butter and granulated sugar together for 2-3 minutes until light and fluffy. Beat in the room temperature egg and vanilla extract until fully incorporated. Add salt and baking powder, mixing to combine. Gradually add all-purpose flour, mixing on low speed until a smooth, cohesive dough forms.
Step 2: Divide and Color the Dough
Divide the dough into two equal portions (use a kitchen scale for precision if desired). Leave one half plain white. Add a small amount of pink gel food coloring to the second half and knead thoroughly until the color is vibrant and evenly distributed throughout the dough.
Step 3: Create the Marble Effect
On a lightly floured work surface, pinch off marble-sized pieces from both the white and pink dough portions. Arrange the pieces alternately, creating a checkerboard pattern. Gently press and fold the dough together with minimal kneading—just enough to create visible swirls and veins of both colors. Critical: Stop mixing while you can still see distinct pink and white streaks. Over-kneading will result in a uniform light pink dough instead of marbled patterns.
Step 4: Chill the Marbled Dough
Shape the marbled dough into a flat disc about 1 inch thick. Wrap tightly in plastic wrap and refrigerate for 30-60 minutes until firm. This chilling step is essential for preventing spread during baking.
Step 5: Roll and Cut Heart Shapes
Preheat your oven to 350°F (175°C). Line baking sheets with parchment paper or silicone baking mats. On a lightly floured surface (or between two sheets of parchment paper), roll the chilled marbled dough to ¼-inch thickness. Use heart-shaped cookie cutters in various sizes to cut out shapes, placing them 2 inches apart on prepared baking sheets.
Step 6: Freeze Before Baking
Place the cut-out cookie shapes on baking sheets and freeze for 15 minutes. This pre-baking freeze is the secret to maintaining sharp, clean edges and preventing any spreading in the oven.
Step 7: Bake to Perfection
Bake frozen cookie cut-outs for 12-14 minutes until edges are set and very lightly golden on the bottom. The tops should remain pale to showcase the marbled pattern. Let cookies rest on the baking sheet for 2-3 minutes before carefully transferring to a wire cooling rack to cool completely.
Professional Tips for Perfect Marbled Cookies
Always Use Gel Food Coloring: Liquid food coloring contains too much moisture, which can throw off the dough consistency and cause unwanted spreading. Gel or paste food coloring provides vibrant color without compromising texture.
The “Light Touch” Marble Method: When creating the marble effect, less is more. Stop kneading the moment you see swirled patterns—continued mixing will blend the colors into solid pink rather than maintaining distinct marbling.
Parchment Paper Rolling Technique: Roll your marbled dough between two sheets of parchment paper to prevent sticking without adding excess flour, which can make cookies dry and tough.
Preserve Marbling When Re-Rolling: Gently press dough scraps together rather than forming into a ball. This maintains some marbled effect even in second-generation cookies.
Chill Twice for Best Results: The initial 30-60 minute chill firms the dough for rolling, while the 15-minute pre-bake freeze ensures zero spreading and razor-sharp edges.
Room Temperature Matters: Softened butter and room temperature eggs create a smooth, easily workable dough. Cold ingredients can result in crumbly, difficult-to-marble dough.
Creative Variations to Try
Almond-Scented Marble Cookies: Add ½ teaspoon almond extract along with the vanilla for that signature bakery-style sugar cookie flavor.
Sparkling Valentine Hearts: Sprinkle cookies with clear sanding sugar or edible pink glitter just before the final freeze for shimmering, glamorous cookies.
Ombre Triple-Marble: Divide dough into three portions—one white, one light pink, one deep pink—and marble all three together for a complex ombre gradient effect.
Royal Icing Outlined Hearts: Once completely cooled, pipe a thin border of white royal icing around each heart’s edge for crisp definition and professional finish.
Red Velvet Marble: Use red gel coloring and add 1 tablespoon cocoa powder to the red portion for a subtle red velvet twist.
Chocolate Marble Hearts: Replace the pink dough with chocolate by adding 2 tablespoons cocoa powder to one half for chocolate-vanilla marbled cookies.
Frequently Asked Questions
Can I prepare the marbled dough in advance? Yes! Wrapped tightly in plastic wrap, marbled dough keeps in the refrigerator for up to 3 days or in the freezer for up to 1 month. Thaw frozen dough overnight in the refrigerator before rolling and cutting.
Why did my marble pattern disappear into solid pink? This happens when the two dough colors are over-kneaded together. The key is using a very light touch when swirling—stop the moment you see distinct streaks of both colors. Think “gentle folding” rather than “thorough mixing.”
How do I prevent my heart-shaped cookies from spreading? The 15-minute pre-bake freeze is crucial. Cold dough hitting a hot oven creates steam that sets the structure before butter can melt and spread. Also ensure you’re using gel food coloring (not liquid) and measuring flour correctly using the spoon-and-level method.
How should I store marbled sugar cookies? Store completely cooled cookies in an airtight container at room temperature for up to 1 week. Layer cookies between parchment paper to prevent sticking. These cookies also freeze beautifully for up to 3 months when stored in freezer-safe containers.
Can I use different colors for other holidays? Absolutely! This marbling technique works with any gel food coloring. Try red and green for Christmas, orange and black for Halloween, or pastels for Easter. You can even marble three colors together for more complex patterns.
My dough is too sticky to roll—what should I do? If your dough feels sticky even after chilling, refrigerate for an additional 15-30 minutes. Alternatively, roll the dough between two sheets of parchment paper to prevent sticking without adding excess flour.
Do I need to re-marble dough scraps? Not necessarily. Gently press scraps together and re-roll as is—they’ll still have some marbled effect. If you want stronger marbling, separate the pink and white portions from scraps and repeat the marbling process.

Marbled Pink Valentine’s Day Sugar Cookies
Equipment
- Mixing bowls
- Hand Mixer
- Rolling Pin
- heart-shaped cookie cutters
- Baking Sheets
- Oven
Ingredients
- 0.5 cup unsalted butter, softened
- 0.5 cup granulated sugar
- 1 large egg, room temperature
- 1.5 tsp vanilla extract
- 0.25 tsp salt
- 0.5 tsp baking powder
- 2 cups all-purpose flour
- pink or red gel food coloring
Instructions
- In a large bowl, beat butter and sugar until light and fluffy. Mix in egg and vanilla, then add salt and baking powder. Gradually mix in flour until a smooth dough forms.
- Divide dough evenly in half. Leave one half plain and tint the other with pink gel food coloring until evenly colored.
- Pinch off small pieces of both doughs and gently knead together just until marbled swirls form. Do not overmix.
- Shape dough into a disc, wrap tightly, and refrigerate for 30–60 minutes.
- Preheat oven to 350°F (175°C). Roll dough to ¼-inch thickness and cut with heart-shaped cutters.
- Place cutouts on a lined baking sheet and freeze for 15 minutes to prevent spreading.
- Bake for 12–14 minutes until edges are set. Cool briefly on the pan, then transfer to a wire rack.