This post may contain affiliate links. As an Amazon Associate, we earn from qualifying purchases. We only recommend products we trust.
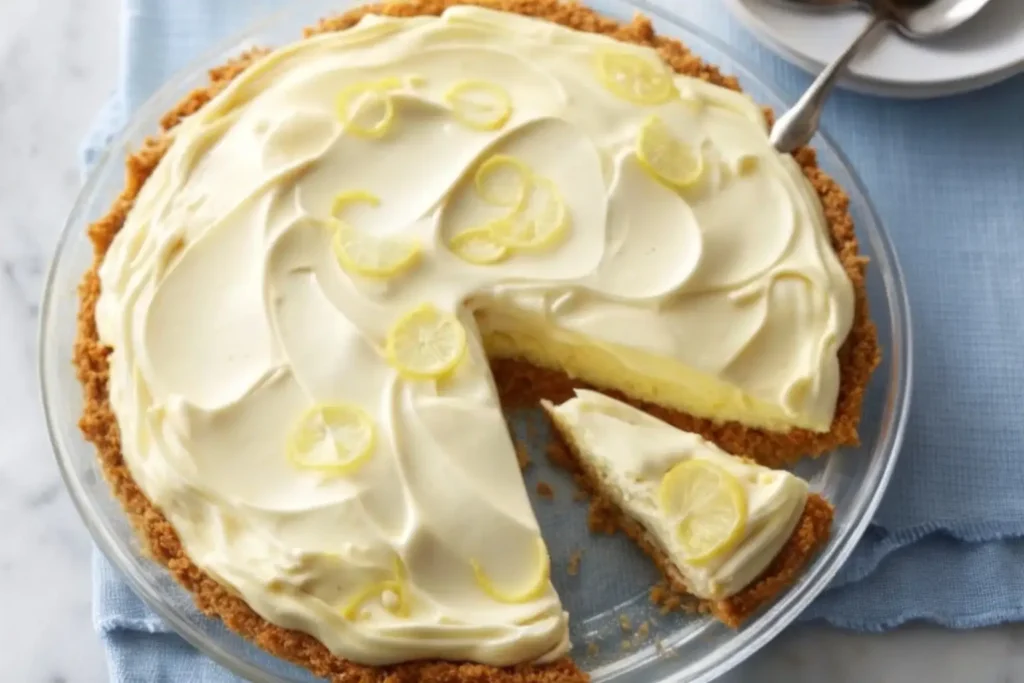
Beat the heat with this incredibly easy no-bake lemon icebox pie! This refreshing summer dessert features a creamy, tangy lemon filling made with just 5 simple ingredients, all nestled in a buttery graham cracker crust. No oven required—just mix, chill, and enjoy the perfect balance of sweet and tart that makes this lemon icebox pie a crowd-pleasing favorite.
This easy no-bake pie is ideal for hot days when you don’t want to turn on the oven, potluck gatherings, last-minute summer party desserts, or any time you’re craving that bright, citrusy flavor of homemade lemonade in pie form. The fluffy, cloud-like texture comes from folding in whipped topping, while sweetened condensed milk provides richness without requiring any cooking or baking.
Whether you call it lemonade icebox pie, lemon cream cheese pie, or frozen lemon pie, this classic American dessert has been cooling down summer afternoons since the days of actual iceboxes. It’s become a staple at family reunions, church
picnics, and backyard barbecues across the country—and once you taste how easy and delicious it is, you’ll understand why!
Table of Contents
Why You’ll Love This No-Bake Lemon Pie
No Oven Required: This no-bake dessert is perfect for summer when heating up the kitchen is the last thing you want to do. Just mix, chill, and serve!
Only 5 Ingredients: The filling requires just cream cheese, sweetened condensed milk, lemonade concentrate, whipped topping, and optional food coloring. That’s it!
Quick & Easy: With only 15 minutes of active prep time, this is one of the easiest lemon pie recipes you’ll ever make. Perfect for beginner bakers or busy weeknights.
Make-Ahead Friendly: Prepare this icebox pie up to 2 days ahead of serving, making it ideal for potluck desserts, holiday gatherings, or summer party planning.
Refreshingly Tart: The tangy lemon flavor is bright and refreshing—not overly sweet—making it the perfect palate cleanser after a heavy meal or the ideal summer treat on a hot day.
Customizable: While delicious as-is, this lemon cream pie easily adapts to different flavor profiles. Swap lemon for lime, orange, or even pineapple for creative variations!
Kid-Friendly: Children love the sweet-tart flavor and creamy texture. Plus, they can help with the simple mixing process, making this a great family baking project.
Budget-Friendly: Using frozen lemonade concentrate and a premade crust keeps costs low while still delivering impressive, bakery-quality results. One of the best cheap dessert ideas that tastes expensive!
Ingredients for Lemon Icebox Pie
This easy lemon pie uses simple pantry staples you probably already have on hand:
For the Lemon Filling:
- 1 package (8 oz) Cream Cheese, softened: The cream cheese provides richness, tang, and body to the filling. Philadelphia cream cheese is the gold standard for consistent results. Make sure it’s fully softened to room temperature (about 1 hour on the counter) to avoid lumps in your filling.
- 1 can (14 oz) Sweetened Condensed Milk: This adds concentrated sweetness and creates that signature creamy texture without requiring any cooking. Eagle Brand or Carnation brand work beautifully. Don’t confuse this with evaporated milk—they’re not interchangeable!
- ¾ cup Frozen Lemonade Concentrate, thawed: The secret ingredient! Frozen lemonade concentrate gives you all the bright lemon flavor without adding excess liquid that would make the pie runny. Minute Maid or Country Time concentrates work well. Thaw it completely before using.
- 1 carton (8 oz) Frozen Whipped Topping, thawed: Cool Whip is the classic choice for this retro dessert recipe. The whipped topping creates that light, fluffy, cloud-like texture. Thaw in the refrigerator overnight for best results.
- Yellow Food Coloring (optional): Just 2-3 drops of gel or liquid food coloring gives the filling that classic pale yellow “lemonade” color. This is purely aesthetic—skip it if you prefer!
For the Crust:
- 1 prepared Graham Cracker Crust (9-inch): Using a premade crust keeps this recipe truly no-bake and effortless. Keebler Ready Crust is a popular choice. Look for crusts in the baking aisle.
Alternative: You can make a homemade graham cracker crust with 1½ cups graham cracker crumbs, 6 tablespoons melted butter, and 3 tablespoons sugar. Press into pie pan and chill for 30 minutes before filling.
Best Brands for Lemon Icebox Pie:
Cream Cheese: Philadelphia (original, not whipped or flavored)
Lemonade Concentrate: Minute Maid or Country Time frozen concentrate
Whipped Topping: Cool Whip (regular or lite)
Graham Cracker Crust: Keebler Ready Crust or Honey Maid
Using quality ingredients makes a noticeable difference in the final taste and texture of your homemade lemon pie!
Step-by-Step Instructions: How to Make Lemon Icebox Pie
This easy no-bake pie comes together in just 15 minutes of hands-on time!
Step 1: Soften the Cream Cheese
Remove cream cheese from the refrigerator 60-90 minutes before starting. It should be soft enough to easily press a finger into, but not melted or oily. Room temperature cream cheese beats smoothly without lumps.
Pro Tip: Forgot to soften your cream cheese? Cut it into small cubes and let sit for 15-20 minutes, or microwave on 50% power in 10-second intervals, checking frequently. Be careful not to melt it!
Step 2: Beat Cream Cheese and Condensed Milk
In a large mixing bowl, use a hand mixer or stand mixer with paddle attachment to beat the softened cream cheese on medium speed until smooth and creamy (about 1-2 minutes). The cream cheese should be completely lump-free.
Add the sweetened condensed milk and continue beating on medium speed until fully incorporated and silky smooth (about 1-2 minutes more). Stop and scrape down the sides of the bowl as needed.
The mixture should be thick, smooth, and pale ivory in color—like a very thick cream cheese frosting.
Pro Tip: Don’t rush this step! Properly beating the cream cheese first ensures a smooth, lump-free filling. Any lumps at this stage will remain in your final pie.
Step 3: Add Lemonade Concentrate
Pour in the ¾ cup thawed lemonade concentrate. Beat on medium-low speed until completely combined (about 30-60 seconds).
The mixture will thin out slightly when you add the lemonade—this is normal! The filling will firm up during chilling.
Pro Tip: Taste the filling at this point. If you prefer a more tart pie, add an extra 1-2 tablespoons of lemonade concentrate. For sweeter, add 1-2 tablespoons additional sweetened condensed milk.
Step 4: Fold in Whipped Topping
Using a rubber spatula, gently fold in the thawed whipped topping. Use a folding motion (cut down through the center, scrape along the bottom, and fold up and over) rather than stirring. This preserves the airiness of the whipped topping and creates that signature fluffy texture.
Fold until the mixture is uniform in color with no white streaks remaining, but don’t overmix—you want to maintain as much air as possible for a light, cloud-like filling.
Optional: Add 2-3 drops of yellow food coloring at this stage and fold until evenly distributed for that classic lemonade-yellow color.
The finished filling should be thick, fluffy, and hold soft peaks—similar to mousse or whipped cream cheese frosting.
Step 5: Fill the Crust
Pour the lemon filling into your prepared graham cracker crust. Use a rubber spatula to scrape every bit of filling from the bowl—no waste!
Gently spread the filling evenly, making sure it reaches all edges of the crust. The filling should mound slightly in the center.
Optional: Use an offset spatula or the back of a spoon to create decorative swirls on top. This adds a professional bakery touch!
Step 6: Chill Until Set
Cover the pie loosely with plastic wrap or aluminum foil (make sure it doesn’t touch the filling surface—you can use toothpicks as tents if needed).
Refrigerate for at least 4 hours or until completely set and firm to the touch. Overnight chilling (8-12 hours) produces the best texture and allows flavors to meld beautifully.
Pro Tip: For the cleanest slices, chill for a full 6-8 hours or overnight. The longer chilling time allows the filling to firm up completely, making it easier to cut neat, Instagram-worthy slices!
Step 7: Serve and Enjoy
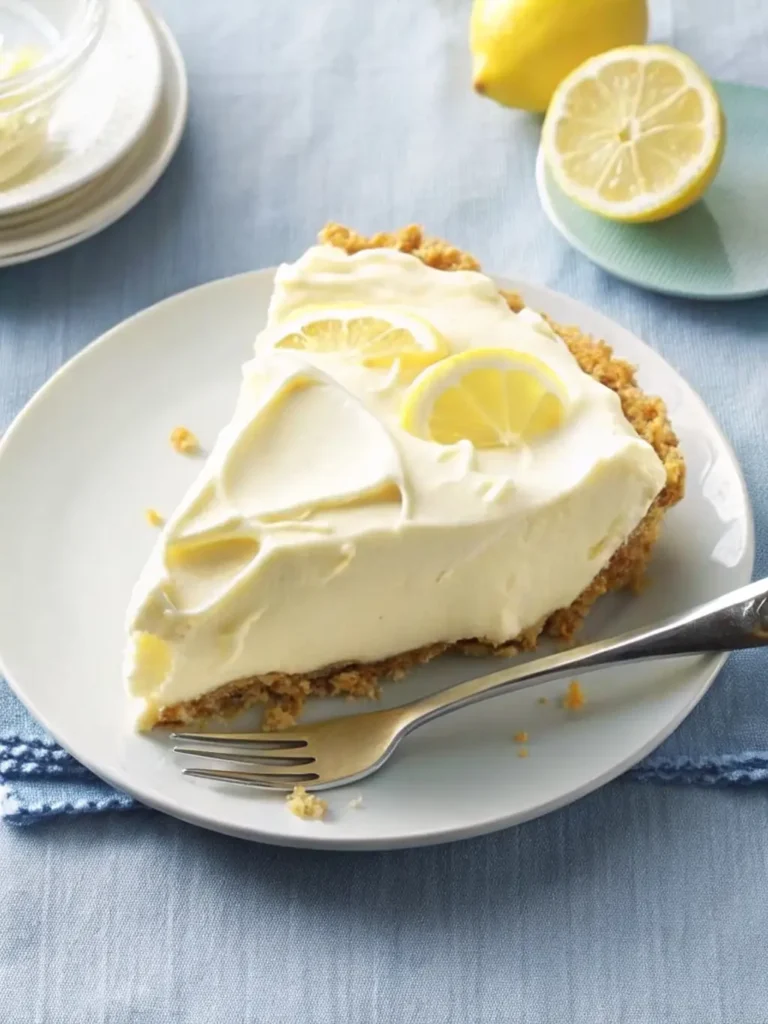
Before serving, let the pie sit at room temperature for 5-10 minutes for easier slicing. Dip your knife in hot water, wipe dry, and make clean cuts for beautiful slices.
Garnish individual slices with fresh whipped cream, lemon slices, lemon zest, or mint leaves if desired.
Pro Tips for Perfect Lemon Icebox Pie Every Time
Use Room Temperature Cream Cheese: This is THE most important tip! Cold cream cheese won’t beat smooth and will leave lumps in your filling. Plan ahead and leave it out for 1-2 hours before making the pie.
Don’t Skip the Chilling Time: While 4 hours is the minimum, overnight chilling produces the best texture. The filling needs time to firm up completely. A warm or partially set pie won’t slice cleanly.
Thaw Ingredients Properly: Both the whipped topping and lemonade concentrate should be fully thawed before using. Thaw whipped topping in the refrigerator overnight (not on the counter or in the microwave).
Fold, Don’t Stir: When adding the whipped topping, use gentle folding motions to preserve airiness. Aggressive stirring deflates the whipped topping and creates a dense, heavy filling.
Prevent a Soggy Crust: Make sure your filling ingredients are cool (not warm) before pouring into the crust. Warm filling can make the crust soggy. If making your own crust, pre-bake it for 5-7 minutes at 350°F and cool completely before filling.
Adjust Sweetness to Taste: The beauty of this customizable pie is that you can control the sweet-tart balance. Add extra lemonade for more pucker or extra condensed milk for sweeter flavor.
Clean Slices Every Time: For picture-perfect slices, wipe your knife clean between each cut. Dipping the knife in hot water helps too—just dry it before cutting.
Make It Pretty: Take 30 seconds to create decorative swirls on top with the back of a spoon. This simple touch makes it look like you spent hours!
Creative Variations for Lemon Icebox Pie
Lime Icebox Pie (Key Lime Style):
Substitute ¾ cup frozen limeade concentrate (or fresh key lime juice mixed with a bit of sugar) for the lemonade. Add 1 teaspoon lime zest for extra citrus punch. This creates a beautiful lime pie reminiscent of the famous Key Lime Pie!
Pink Lemonade Icebox Pie:
Use pink lemonade concentrate instead of regular lemonade. Add a few drops of pink or red food coloring for a vibrant pink filling. Top with fresh raspberries or strawberry slices. Perfect for Valentine’s Day desserts or girl’s night!
Orange Dreamsicle Pie:
Replace lemonade concentrate with ¾ cup thawed orange juice concentrate and add ½ teaspoon orange zest. This tastes like a creamy orange creamsicle in pie form—a huge hit with kids!
Strawberry Lemonade Pie:
Fold in ½ cup finely chopped fresh strawberries along with the whipped topping. Use strawberry lemonade concentrate if available. Garnish with fresh sliced strawberries for a beautiful summer pie.
Lemon Blueberry Icebox Pie:
Gently fold ¾ cup fresh blueberries into the filling before pouring into the crust. The berries sink slightly, creating pockets of fruity flavor throughout. A stunning patriotic dessert for 4th of July!
Coconut Lemon Pie:
Use a coconut cookie crust instead of graham cracker. Fold ½ cup toasted coconut flakes into the filling. Garnish with more toasted coconut on top. Tropical paradise!
Meyer Lemon Icebox Pie:
If you can find Meyer lemon concentrate or have fresh Meyer lemons, their sweeter, more floral flavor creates an elegant, gourmet version. Add 2 tablespoons Meyer lemon zest for maximum flavor.
Lemon Lavender Pie:
Steep 1 teaspoon dried culinary lavender in 2 tablespoons warm cream for 10 minutes, strain, and add to the cream cheese mixture. Subtle floral notes elevate this to a sophisticated elegant dessert.
Boozy Adult Version:
Add 2-3 tablespoons limoncello liqueur to the filling for a grown-up twist. Perfect for summer cocktail parties!
Sugar-Free / Low-Carb Version:
Use sugar-free sweetened condensed milk alternative, sugar-free lemonade, and sugar-free whipped topping. Use a nut-based crust (almond flour + butter). Great for diabetic-friendly desserts or keto pie options.
How to Store and Freeze Lemon Icebox Pie
Refrigerator Storage:
Store covered no-bake lemon pie in the refrigerator for up to 5 days (not just 4 as competitor states). Cover tightly with plastic wrap or store in an airtight pie container to prevent the filling from absorbing refrigerator odors.
For best texture and flavor, consume within 3-4 days. After day 4, the crust may begin to soften and the filling can develop a slightly grainy texture (though it’s still safe to eat for 5-6 days).
Pro Tip: If you notice condensation forming on the plastic wrap, blot it gently with a paper towel before re-covering. Excess moisture can make the filling weepy.
Can You Freeze Lemon Icebox Pie?
Yes, but with caveats. While the competitor says cream pies don’t freeze well, this one actually freezes better than most cream pies due to the stabilizers in Cool Whip!
To Freeze:
- Freeze the pie uncovered for 1-2 hours until surface is firm
- Wrap tightly in 2-3 layers of plastic wrap
- Wrap again in aluminum foil
- Freeze for up to 2 months
To Thaw:
- Remove wrapping and place in refrigerator
- Thaw slowly for 4-6 hours or overnight
- Let stand at room temperature 10 minutes before serving
Expected Results: The texture will be slightly icier and less fluffy than fresh, but still delicious! Some people actually prefer the semi-frozen texture—it’s like a lemon ice cream pie.
Best Use for Frozen: Serve partially frozen (like ice cream pie) for a different but equally delicious experience. This is perfect for hot summer days!
Make-Ahead Instructions:
For Best Results: Make this make-ahead dessert 1-2 days before serving. The flavors actually improve as they meld together in the refrigerator.
Timeline:
- 2 days ahead: Make and chill the pie
- Day of: Add garnishes like whipped cream, lemon slices, or fresh berries just before serving
- 1 hour before: Let pie sit at room temperature for easier slicing (optional)
This makes it perfect for holiday pies, potluck contributions, or party planning when you want to reduce day-of stress!
Serving Suggestions for Lemon Icebox Pie
Classic Garnishes:
- Fresh Whipped Cream: Pipe rosettes around the edge or dollop on individual slices
- Lemon Slices: Thin slices or twists add elegant visual appeal
- Lemon Zest: Fresh grated lemon zest adds bright color and aroma
- Fresh Mint Leaves: A sprig of mint provides color contrast and freshness
- Graham Cracker Crumbs: Sprinkle around edges for texture
- White Chocolate Shavings: Adds elegance for special occasions
Pairing Suggestions:
Beverages:
- Iced Tea: Classic Southern pairing—sweet or unsweetened
- Lemonade: Double down on the lemon flavor!
- Sparkling Water: With lemon or lime for a refreshing non-alcoholic option
- White Wine: Try a Riesling or Moscato for sweet wine lovers
- Champagne: Makes any occasion feel celebratory
- Coffee or Espresso: The bitterness balances the sweet-tart pie
When to Serve:
- Summer BBQs: Light and refreshing after grilled meats
- Pool Parties: Serve partially frozen for a cool treat
- Baby Showers: Elegant and easy to serve individually
- Mother’s Day Brunch: Pair with fresh berries
- Fourth of July: Top with blueberries and whipped cream for red, white, and blue
- Potluck Dinners: Transport easily and always a crowd-pleaser
Presentation Ideas:
Individual Portions: Use a 2-inch cookie cutter to cut filling from the crust, then plate on graham cracker crumbs for mini lemon pie servings.
Mason Jar Versions: Layer graham cracker crumbs, filling, and whipped cream in individual jars for portable picnic desserts.
Pie Bar Station: Serve with various toppings (berries, whipped cream, chocolate sauce, caramel) so guests can customize their slice.
Fancy Plating: Place slice on plate, drizzle with raspberry coulis, add a mint sprig and fresh berries for restaurant-style presentation.
Frequently Asked Questions About Lemon Icebox Pie
Q: Can I use fresh lemon juice instead of frozen concentrate?
A: Not directly. Fresh lemon juice is much thinner and will make the filling runny. If you must use fresh, combine ⅓ cup fresh lemon juice + ⅓ cup sugar, simmer until sugar dissolves and liquid reduces by half, cool completely, then use. However, frozen concentrate is specifically designed for this recipe and provides better, more consistent results.
Q: Why is my filling runny and not setting?
A: Several causes: (1) Didn’t chill long enough—wait the full 4-6 hours minimum, (2) Used fresh lemon juice instead of concentrate, (3) Cream cheese wasn’t fully softened and incorporated, creating an uneven mixture, or (4) Whipped topping wasn’t fully thawed. Make sure all ingredients are at the correct temperature and give it adequate chill time.
Q: Can I make this with homemade whipped cream instead of Cool Whip?
A: Yes, but the texture will be different. Beat 1 cup heavy cream with 2 tablespoons powdered sugar until stiff peaks form, then fold in. Note that real whipped cream deflates faster than Cool Whip, so the filling will be slightly less stable and may separate after 2-3 days. Consume within 2 days for best results.
Q: My filling has a grainy texture. What went wrong?
A: This usually happens when the cream cheese wasn’t fully softened before beating, leaving tiny lumps of cold cream cheese that don’t dissolve. Always bring cream cheese to full room temperature (60-70°F). You can strain the filling through a fine-mesh sieve before pouring into the crust if needed.
Q: Can I make this dairy-free or vegan?
A: Yes! Use vegan cream cheese (Kite Hill or Daiya), dairy-free condensed milk (Nature’s Charm coconut condensed milk), and dairy-free whipped topping (CocoWhip or So Delicious CocoWhip). Use a dairy-free graham cracker crust or make one with vegan butter. The result is surprisingly close to the original!
Q: How do I prevent the crust from getting soggy?
A: (1) Make sure all filling ingredients are cool before assembling, (2) If making your own crust, pre-bake it for 5-7 minutes at 350°F and cool completely, (3) Brush the inside of premade crusts with melted white chocolate and let set before filling (creates a moisture barrier), or (4) Add filling just 4-6 hours before serving rather than overnight.
Q: Can I double this recipe for a 9×13 pan?
A: Absolutely! Double all filling ingredients and spread into a 9×13-inch pan lined with graham cracker crumb crust. Press 2½ cups graham cracker crumbs + ¾ cup melted butter + ⅓ cup sugar into the pan, chill, then add doubled filling. Serves 12-15 people—perfect for crowd-pleasing desserts!
Q: What’s the difference between icebox pie and cream pie?
A: “Icebox pie” specifically refers to no-bake pies that set firm in the refrigerator (or old-fashioned iceboxes). Cream pies can be baked or unbaked but always contain a cream-based filling. So this lemon icebox pie is both an icebox pie AND a cream pie—it’s no-bake and cream-based!
Q: My pie is too tart/too sweet. How can I fix it?
A: The beauty of this recipe is you can adjust it! For less tartness, reduce lemonade concentrate to ½ cup or add 2-3 tablespoons more sweetened condensed milk. For more pucker, add up to 1 full cup of lemonade concentrate or stir in 1 tablespoon fresh lemon juice. Taste the filling before chilling and adjust to your preference!
Q: Can I use a different type of crust?
A: Yes! This filling pairs beautifully with:
- Vanilla wafer crust (sweeter, more delicate)
- Oreo cookie crust (chocolate-lemon combo)
- Shortbread crust (buttery richness)
- Nilla wafer crust (classic Southern style)
- Coconut macaroon crust (tropical twist)
- Gingersnap crust (warm spice notes)
Just substitute 1½ cups crushed cookies + 5-6 tablespoons melted butter, press into pan, and chill.
Q: How far in advance can I make this?
A: Make it 1-2 days ahead for optimal texture and flavor. Don’t make more than 3 days ahead as the crust begins to soften significantly. Add garnishes (whipped cream, fruit, etc.) just before serving, not in advance.
Q: Is this safe for pregnant women to eat?
A: Yes! Since this pie uses pasteurized cream cheese and doesn’t contain raw eggs, it’s perfectly safe during pregnancy. All ingredients are shelf-stable or pasteurized dairy products. However, always consult your doctor if you have specific dietary concerns.
Why This Is the Best Lemon Icebox Pie Recipe
This no-bake lemon pie recipe has earned its status as a beloved classic for good reason. It combines the nostalgia of old-fashioned icebox desserts with modern convenience—no tricky pie crust to roll out, no water bath baking, no tempering egg custard. Just five ingredients, one bowl, and 15 minutes of work delivers a pie that tastes like you spent all day in the kitchen.
The lemonade concentrate is the genius ingredient that sets this apart from other lemon cream pie recipes. It provides concentrated lemon flavor without the liquid that would make the filling loose and runny. The result is a filling that’s perfectly firm when chilled, slices cleanly, and has that bright, sunny lemon taste that makes you think of summer days and front porch sitting.
Whether you’re making this for a summer potluck, a holiday gathering, or just because you’re craving something sweet and tangy, this easy lemon pie never disappoints. It’s foolproof enough for beginning bakers yet impressive enough to serve at special occasions. The light, fluffy texture feels indulgent without being heavy, and the graham cracker crust adds just the right amount of buttery crunch.
Best of all, this is a make-ahead dessert that actually benefits from resting in the refrigerator overnight. The flavors meld, the texture becomes perfectly creamy, and you can check “dessert” off your list before party day even arrives. It’s the ultimate stress-free dessert for busy home cooks who refuse to sacrifice flavor for convenience.
More No-Bake Summer Desserts
Once you’ve mastered this lemon icebox pie, try these other easy no-bake desserts perfect for warm weather:
- Key Lime Pie: The Florida cousin to this lemon version
- Peanut Butter Pie: Rich, creamy, and chocolate-topped
- Strawberry Icebox Cake: Layers of cookies and whipped cream
- No-Bake Cheesecake: Classic creamy texture without baking
- Banana Pudding: Southern comfort in a bowl
- Lemon Lush Dessert: Layered lemon dessert bar
- Dirt Cups: Fun individual desserts with pudding and cookies
The no-bake technique you’ve learned here works beautifully for countless other summer treats—so keep that oven off and enjoy more cool, creamy desserts all season long!

No-Bake Lemon Icebox Pie
Equipment
- Large mixing bowl
- Hand Mixer or Stand Mixer
- Rubber Spatula
- 9-inch pie pan (if making homemade crust)
- plastic wrap or aluminum foil
Ingredients
- 8 oz cream cheese, softened
- 14 oz sweetened condensed milk (1 can)
- 0.75 cup frozen lemonade concentrate, thawed
- 8 oz frozen whipped topping, thawed
- 2-3 drops yellow food coloring (optional)
- 1 9-inch prepared graham cracker crust
Instructions
- In a large bowl, beat softened cream cheese on medium speed until smooth and creamy (1–2 minutes).
- Add sweetened condensed milk and beat until fully incorporated and silky smooth. Scrape down sides as needed.
- Beat in thawed lemonade concentrate until completely combined.
- Gently fold in whipped topping using a rubber spatula until no streaks remain. Add food coloring if desired and fold until evenly distributed.
- Pour filling into prepared graham cracker crust and spread evenly. Create decorative swirls if desired.
- Cover loosely and refrigerate at least 4 hours or overnight until fully set.
- Let sit at room temperature 5–10 minutes before slicing. Garnish as desired and serve.