This post may contain affiliate links. As an Amazon Associate, we earn from qualifying purchases. We only recommend products we trust.
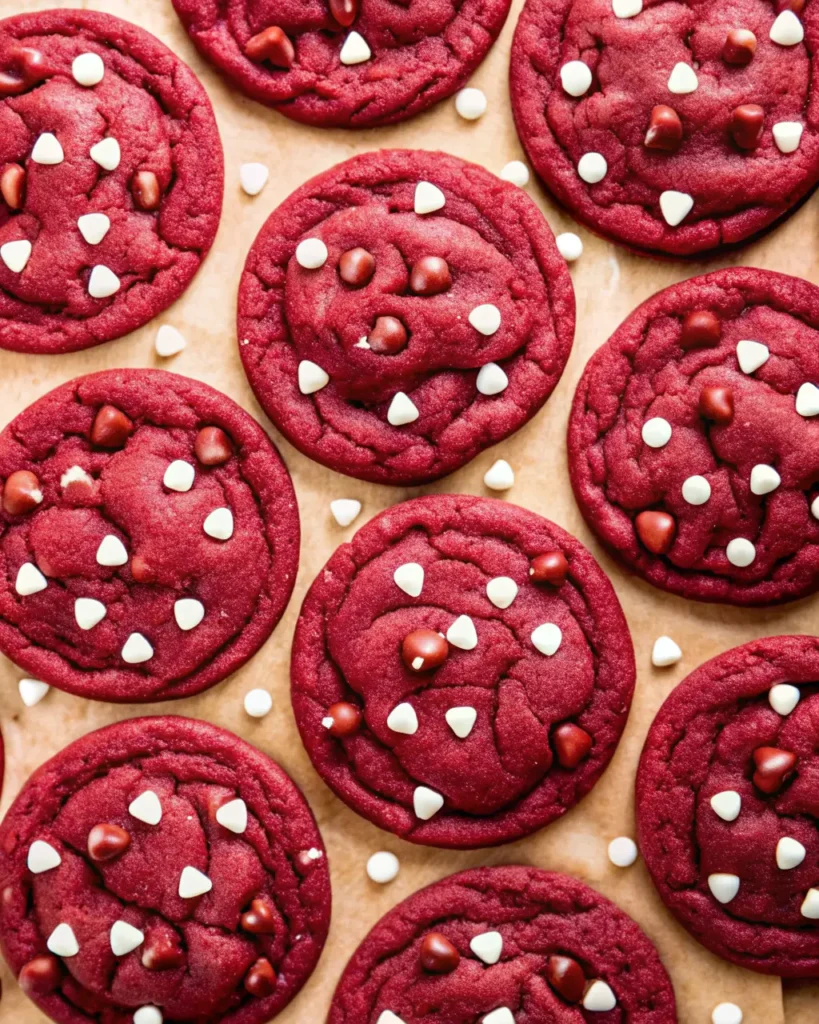
These red velvet cookies bring all the charm of classic red velvet cake in an easy cookie form. Featuring chewy centers, crispy edges, and pools of melty white chocolate throughout, these vibrant red cookies require no chill time and come together in just 30 minutes. The subtle cocoa flavor combined with sweet white chocolate creates an irresistible treat that’s perfect for Valentine’s Day, Christmas, or any time you want to make something special.
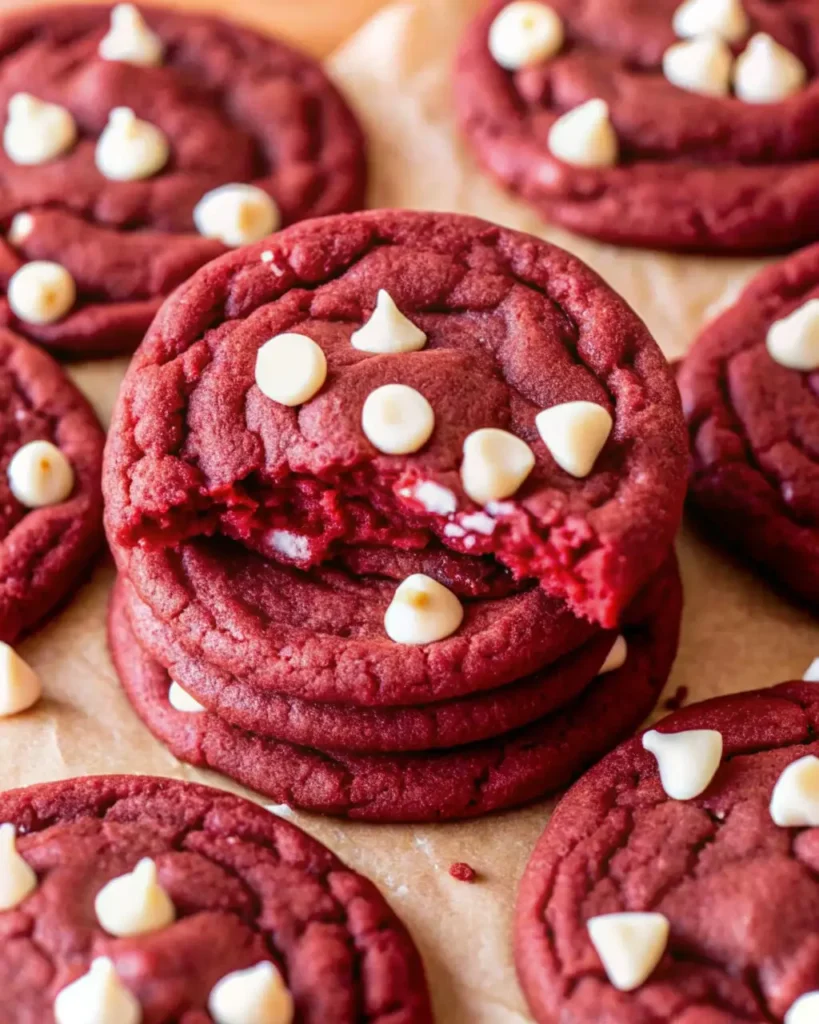
Table of Contents
Why You’ll Love This Red Velvet Cookie Recipe
No Chill Time Required: Unlike most cookie recipes, these can go from mixing bowl to oven in minutes—perfect when you need a quick treat.
Classic Red Velvet Flavor: The subtle cocoa combined with vanilla creates that signature red velvet taste everyone loves.
Perfect Texture: Brown sugar creates chewy centers while the edges get delightfully crispy.
Eye-Catching Color: The vibrant red color makes these cookies perfect for holidays and celebrations.
White Chocolate Goodness: Generous amounts of white chocolate chunks add sweetness and visual appeal.
Beginner-Friendly: Simple ingredients and straightforward steps make these accessible for all baking skill levels.
Ingredients for Red Velvet Cookies
Dry Ingredients
- 1½ cups + 2 tbsp (204g) all-purpose flour – Properly measured (spoon and level)
- 2 tbsp (10g) Dutch process cocoa powder – Creates subtle chocolate flavor
- ½ tsp baking soda – Helps cookies spread
- ½ tsp baking powder – Creates lift and chewy texture
- ½ tsp salt – Enhances all flavors
Wet Ingredients
- ¾ cup (168g) salted butter, softened – Creates rich, tender cookies
- ¾ cup (165g) light brown sugar, packed – Adds chewiness and moisture
- ¼ cup (50g) granulated white sugar – Creates crispy edges
- 2 egg yolks, room temperature – Makes cookies rich and chewy
- 1 tbsp vanilla extract or vanilla bean paste – Essential for red velvet flavor
- 1-1½ tsp red gel food coloring – Creates the signature red color
Mix-Ins
- ¾ cup (150g) white chocolate chunks or chips – Use high-quality white chocolate for best results
Ingredient Notes
Red Food Coloring: Gel food coloring is essential for achieving vibrant red without adding too much liquid. Start with 1 teaspoon and add more if you want deeper color. Liquid food coloring won’t work as well.
Cocoa Powder: Dutch process cocoa provides the best flavor and color, but natural cocoa powder works too. Don’t skip it—the subtle chocolate flavor is what makes red velvet special.
Butter: Must be softened to room temperature (should leave an indent when pressed but still hold its shape). Don’t use melted butter.
Egg Yolks Only: Using just yolks (not whole eggs) creates richer, chewier cookies without making them cakey.
White Chocolate: Chop a high-quality white chocolate bar for best results, or use good white chocolate chips. Avoid baking chips that don’t melt well.
How to Make Red Velvet Cookies (Step-by-Step)
Step 1: Preheat and Prep
Preheat oven to 350°F (175°C). Line two baking sheets with parchment paper or silicone baking mats.
Step 2: Mix Dry Ingredients
In a small bowl, whisk together flour, cocoa powder, baking soda, baking powder, and salt until well combined. Set aside.
Step 3: Cream Butter and Sugars
In a large mixing bowl, beat softened butter, brown sugar, and granulated sugar with an electric mixer on medium-high speed for 2 minutes until light, fluffy, and pale in color. This step is crucial for texture—don’t rush it!
Step 4: Add Wet Ingredients
Add egg yolks, vanilla extract, and red gel food coloring to the butter mixture. Beat on medium speed for 2 full minutes until the mixture is fluffy and well combined. The color will brighten as you mix.
Pro Tip: Don’t skip the full 2 minutes of mixing—this creates the perfect cookie texture by incorporating air.
Step 5: Incorporate Dry Ingredients
Add the dry ingredients to the wet mixture. Mix on low speed just until combined. The dough will be thick and may seem hard to mix—this is normal! Don’t overmix or cookies will be tough.
Step 6: Add White Chocolate
Fold in white chocolate chunks or chips, mixing just until evenly distributed throughout the dough.
Step 7: Shape and Bake
Scoop dough into 18 equal balls (about 2 tablespoons each) and place on prepared baking sheets, spacing them 2 inches apart. No need to flatten—they’ll spread naturally.
Bake for 10-12 minutes:
- 10 minutes = slightly underdone centers, extra chewy
- 12 minutes = crispier edges, still soft centers
Step 8: Cool and Finish
Remove from oven when edges are set but centers still look slightly soft. Let cookies cool on the baking sheet for 5 minutes, then transfer to a wire rack to cool for an additional 5 minutes before serving.
Optional: Press extra white chocolate chunks on top immediately after removing from oven for a bakery-style look.
Baker’s Trick: Use a circular cookie cutter to gently swirl around each cookie while they’re still hot to create perfectly round shapes.
Expert Tips for Perfect Red Velvet Cookies
Measure Flour Correctly: Never scoop directly from the bag. Use the spoon-and-level method or weigh your flour (1 cup = 125g). Too much flour makes cookies dry.
Room Temperature Matters: Both butter and egg yolks should be at room temperature for proper mixing and the best texture.
Beat Eggs Thoroughly: Mix egg yolks into butter mixture until fluffy, not just combined. This 2-minute step creates the perfect chewy texture.
Don’t Overbake: Cookies should look slightly underdone when you remove them. They’ll continue cooking on the hot pan and will firm up as they cool.
Gel Food Coloring Only: Liquid food coloring adds too much moisture and won’t give you vibrant color. Invest in gel coloring for best results.
Quality White Chocolate: Use real white chocolate (containing cocoa butter), not white baking chips. Ghirardelli, Lindt, or chopped white chocolate bars work beautifully.
Troubleshooting Common Issues
Cookies Not Spreading?
- Butter may have been too cold—it needs to be softened but not melted
- Too much flour—measure properly using spoon-and-level method
- Dough may have gotten too cold if you made it ahead
Color Not Bright Enough?
- Use gel food coloring, not liquid
- Add an extra ½ teaspoon of red gel coloring
- Some cocoa powders darken the dough—use Dutch process for brightest color
Dough Too Thick/Hard to Mix?
- This is normal! The dough should be thick and moldable
- If using a hand mixer, it may require some muscle—this is expected
- Switch to high speed briefly if needed, but don’t overmix
Cookies Too Dry?
- Overbaked—reduce time by 1-2 minutes
- Too much flour—weigh ingredients for accuracy
- Eggs may not have been beaten long enough
Cookies Too Flat?
- Butter was too soft or melted
- Baking sheets were still hot from previous batch
- Check that baking soda and baking powder are fresh
Storage and Make-Ahead Instructions
Room Temperature: Store in an airtight container at room temperature for up to 3 days. Place parchment paper between layers to prevent sticking.
Refrigerator: Keep in airtight container in the fridge for up to 5 days. Bring to room temperature or warm briefly for best texture.
Freezer (Baked Cookies): Freeze in airtight container for up to 2 weeks. Thaw at room temperature for 30 minutes before serving.
Freezer (Cookie Dough): Scoop into balls, freeze on a baking sheet until solid, then transfer to freezer bags for up to 2 weeks. Bring to room temperature for 10 minutes before baking, or bake from frozen adding 1-2 extra minutes.
Make-Ahead Dough: Prepare dough and refrigerate for up to 3 days. Bring to room temperature for 10-15 minutes before scooping and baking to ensure proper spreading.
Creative Variations
Cream Cheese Filled: Stuff with sweetened cream cheese filling before baking (like cheesecake cookies) for an ultra-decadent treat.
Dark Chocolate Chunks: Swap white chocolate for dark chocolate chunks for a richer, more sophisticated flavor.
Cream Cheese Frosting: Top cooled cookies with cream cheese frosting for true red velvet cake experience.
Red Velvet Sandwich Cookies: Make cream cheese filling and sandwich between two cookies.
Brown Butter Version: Brown the butter before using for nutty, caramelized flavor (allow to cool to room temp first).
Other Colors: Use different gel colors for holidays—green for Christmas, pink for baby showers, blue for birthdays.
Mint Chocolate: Replace vanilla with peppermint extract and use white chocolate chips.
Add Pecans: Fold in ½ cup chopped pecans along with white chocolate for Southern flair.
Frequently Asked Questions
Do these cookies require chilling? No! That’s what makes them perfect for quick baking. You can bake them immediately after mixing.
Can I use regular cocoa powder instead of Dutch process? Yes, regular (natural) cocoa powder works, though Dutch process provides better flavor and color.
What if I only have liquid food coloring? Liquid won’t give you vibrant color and adds too much moisture. Gel food coloring is essential for this recipe.
Can I use different colored food coloring? Absolutely! These work great with any color—try green, blue, pink, or purple for different occasions.
Why do the cookies use only egg yolks? Egg yolks create richer, chewier cookies. Whole eggs would make them more cakey.
Can I make these with brown butter? Yes! Brown the butter, let it cool to room temperature, then use as directed. This adds wonderful nutty flavor.
Can I stuff these with cream cheese filling? Yes! Several readers have successfully stuffed these like the lemon or strawberry cheesecake cookies. Use about 1 teaspoon filling per cookie.
Can I freeze baked cookies? Yes, store in airtight container and freeze for up to 2 weeks. Thaw at room temperature before serving.
Serving Suggestions
Valentine’s Day: These vibrant red cookies are perfect for Valentine’s celebrations, classroom parties, or romantic dinners.
Christmas Cookies: Use green food coloring instead of red for festive holiday cookies.
Cookie Platters: Pair with chocolate chip, sugar cookies, and brownies for variety.
Beverage Pairings: Serve with cold milk, hot chocolate, coffee, or red velvet lattes.
Ice Cream Sandwiches: Sandwich vanilla or cream cheese ice cream between two cookies.
Party Dessert Tables: Arrange on tiered stands for birthdays, weddings, or baby showers.
Gift Boxes: Package in clear boxes or decorative tins for beautiful homemade gifts.
Why This Recipe Works
The secret to these perfect red velvet cookies lies in the sugar ratio and the egg yolks. Using mostly brown sugar creates incredible chewiness, while a small amount of white sugar helps the edges crisp up. The egg yolks (without whites) make the cookies extra rich and prevent them from becoming cakey.
The combination of both baking soda and baking powder creates the ideal spread and rise, resulting in cookies that are thick but not too puffy. The subtle cocoa powder provides that signature red velvet flavor without overpowering the sweetness of the white chocolate.
Most importantly, no chill time is required! The thick dough holds its shape beautifully right out of the mixing bowl, making these perfect for when you need impressive cookies fast.
Nutritional Information (Per Cookie, Makes 18)
- Calories: 185
- Total Fat: 9g
- Saturated Fat: 5.5g
- Carbohydrates: 24g
- Fiber: 0g
- Sugar: 16g
- Protein: 2g
Nutritional values are approximate and may vary based on specific ingredients used.

Red Velvet Cookies with White Chocolate
Equipment
- Mixing bowls
- Electric mixer
- Whisk
- Spatula
- Baking Sheets
- parchment paper or silicone mats
- Wire Cooling Rack
Ingredients
- Dry Ingredients
- 1½ cups + 2 tbsp all-purpose flour (204g)
- 2 tbsp Dutch process cocoa powder (10g)
- ½ tsp baking soda
- ½ tsp baking powder
- ½ tsp salt
- Wet Ingredients
- ¾ cup salted butter, softened (168g)
- ¾ cup light brown sugar, packed (165g)
- ¼ cup granulated sugar (50g)
- 2 egg yolks, room temperature
- 1 tbsp vanilla extract or vanilla bean paste
- 1–1½ tsp red gel food coloring
- Mix-Ins
- ¾ cup white chocolate chunks or chips (150g)
Instructions
- Preheat oven to 350°F (175°C). Line two baking sheets with parchment paper or silicone mats.
- In a bowl, whisk together flour, cocoa powder, baking soda, baking powder, and salt. Set aside.
- In a large mixing bowl, beat softened butter, brown sugar, and granulated sugar on medium-high speed for 2 minutes until light and fluffy.
- Add egg yolks, vanilla, and red gel food coloring. Beat on medium speed for 2 full minutes until the mixture is bright, fluffy, and fully combined.
- Add the dry ingredients to the wet mixture and mix on low speed just until combined. The dough will be thick—don’t overmix.
- Fold in the white chocolate chunks or chips until evenly distributed throughout the dough.
- Scoop dough into 18 balls (about 2 tablespoons each). Place on baking sheets, spacing 2 inches apart. Bake for 10–12 minutes—10 for chewy centers, 12 for crispier edges.
- Remove cookies when edges are set but centers still look slightly soft. Cool 5 minutes on pan, then transfer to a rack. Press extra white chocolate pieces on top if desired for a bakery look.