This post may contain affiliate links. As an Amazon Associate, we earn from qualifying purchases. We only recommend products we trust.
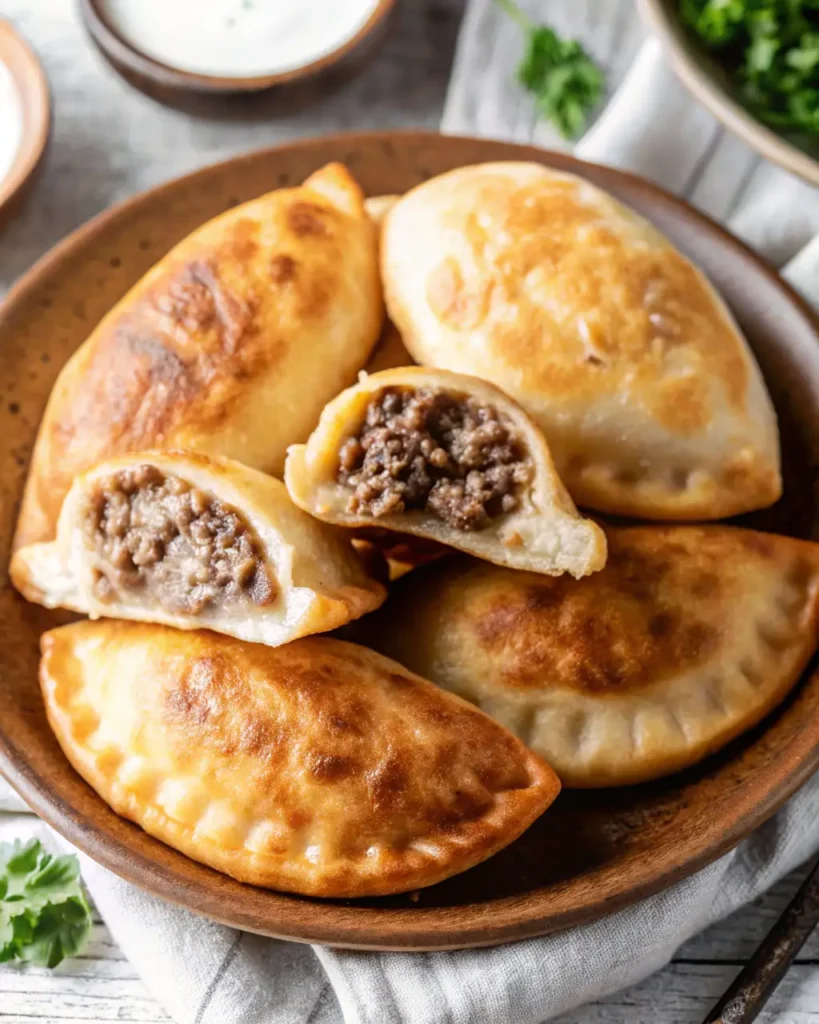
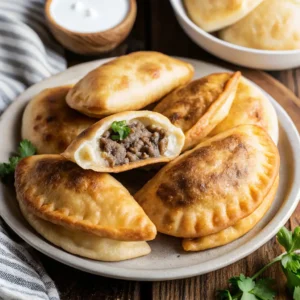
These Russian piroshki are golden, pillowy hand pies filled with savory seasoned beef and onions, wrapped in soft yeast dough. Whether baked until golden or fried until crispy, these traditional Russian pastries are irresistibly delicious and deeply satisfying. The soft, slightly sweet dough creates perfect contrast with the richly spiced meat filling, making each bite a delightful combination of textures and flavors. Perfect for parties, meal prep, or freezing for later, piroshki are versatile comfort food that has been beloved in Russian households for centuries. Serve warm with sour cream, alongside borscht, or with a cup of tea for an authentic Russian experience.
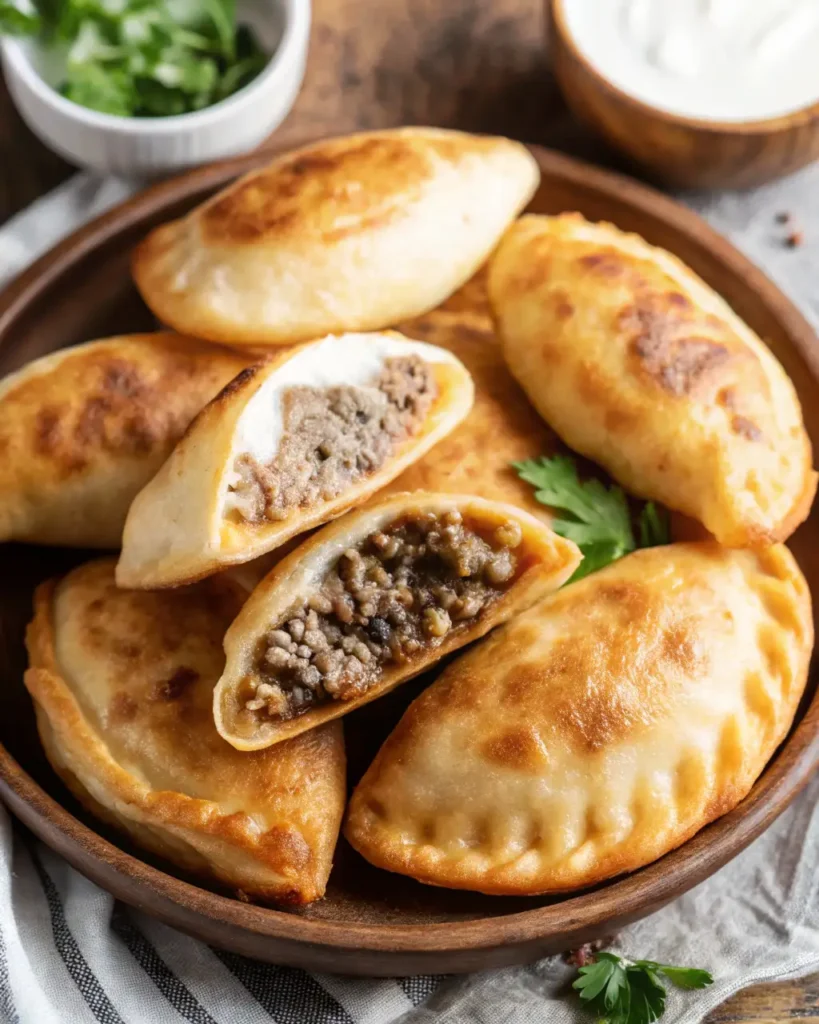
Table of Contents
Why You’ll Love This Piroshki Recipe
Authentic Russian Recipe: Traditional preparation passed down through generations.
Versatile Cooking Methods: Bake for lighter option or fry for extra crispy exterior.
Perfect for Entertaining: Makes 12 hand pies—ideal for parties and gatherings.
Freezer-Friendly: Make ahead and freeze unbaked or baked for easy meals.
Customizable Fillings: Easily adapt with different meats or vegetarian options.
Soft, Tender Dough: Yeast dough creates pillowy texture that’s not too heavy.
Great for Meal Prep: Reheats beautifully for lunches or quick dinners.
What Are Piroshki?
Piroshki (also spelled pirozhki) are traditional Russian hand pies made with soft yeast dough filled with savory or sweet ingredients. The word comes from “pirozhok,” meaning “little pie” in Russian. These portable pastries were historically popular street food, sold by vendors from baskets. Today, they’re enjoyed as snacks, appetizers, or main courses throughout Russia and Eastern Europe. Piroshki can be baked or fried, and fillings range from ground meat and cabbage to mushrooms, potatoes, eggs, or even fruit preserves for sweet versions.
Ingredients for Russian Piroshki
For the Dough
- 2 cups (250g) all-purpose flour – Plus more for dusting
- ½ tsp salt – Enhances dough flavor
- 1 tsp sugar – Feeds yeast and adds subtle sweetness
- 2 tsp instant yeast – Or active dry yeast (see notes)
- ½ cup (120ml) warm milk – About 110°F/43°C
- ¼ cup (60ml) warm water – Same temperature as milk
- ¼ cup (60ml) vegetable oil – Makes dough tender
- 1 large egg – Adds richness and color
For the Beef Filling
- 1 lb (450g) ground beef – Or half beef, half pork
- 1 small onion, finely chopped – Essential for flavor
- ½ cup (75g) mushrooms, finely chopped (optional) – Adds earthiness
- 1 tbsp butter – For sautéing
- Salt and black pepper to taste – Season generously
- Optional: 1 clove garlic, minced – Extra flavor
- Optional: 1 tsp fresh dill, chopped – Traditional addition
For Finishing
- 1 egg, beaten – For egg wash (baked version)
- Vegetable oil for frying – If frying instead of baking
Ingredient Notes
Yeast: Instant yeast can be mixed directly with flour. Active dry yeast needs to be dissolved in warm liquid first.
Milk Temperature: Too hot kills yeast, too cold won’t activate it. Aim for 110°F (feels warm but not hot on wrist).
Ground Meat: Traditional uses beef, but beef/pork combination (50/50) creates more flavorful filling. Ground turkey works for leaner option.
Flour: All-purpose works perfectly. For lighter texture, can substitute up to ½ cup with cake flour.
Mushrooms: Optional but add wonderful umami depth. Use button, cremini, or wild mushrooms.
How to Make Russian Piroshki (Step-by-Step)
Step 1: Make the Dough
In large mixing bowl, combine flour, salt, sugar, and instant yeast. Mix well.
Add warm milk, warm water, vegetable oil, and egg. Mix with wooden spoon or hands until dough comes together.
Turn dough onto lightly floured surface and knead for 5-7 minutes until smooth, elastic, and no longer sticky. Dough should bounce back when poked.
Kneading Tip: If dough is too sticky, add flour 1 tablespoon at a time. If too dry, add water 1 teaspoon at a time.
Step 2: First Rise
Place dough in lightly oiled bowl, turning to coat. Cover with clean kitchen towel or plastic wrap.
Let rise in warm, draft-free place for 1 hour, or until doubled in size.
Finding Warm Spot: Inside turned-off oven with light on, near (not on) warm stovetop, or sunny windowsill.
Step 3: Prepare the Filling
While dough rises, make filling. Heat butter in large skillet over medium heat.
Add chopped onion and cook for 3-4 minutes until softened and translucent.
Add mushrooms (if using) and cook for 3-4 minutes until moisture evaporates.
Add ground beef, breaking it into small crumbles. Season generously with salt and pepper (and garlic if using).
Cook for 8-10 minutes, stirring occasionally, until beef is fully browned and no pink remains.
Important: Let filling cool completely before assembling piroshki. Hot filling makes dough difficult to handle.
Step 4: Shape the Piroshki
Once dough has doubled, punch it down to release air. Turn onto lightly floured surface.
Divide dough into 12 equal pieces (about 2 oz/60g each). Roll each piece into smooth ball.
Working with one ball at a time (keep others covered), roll or flatten into 4-inch circle about ¼-inch thick.
Place heaping tablespoon of cooled filling in center of circle.
Pro Tip: Don’t overfill! Too much filling makes sealing difficult and causes bursting during cooking.
Step 5: Seal the Piroshki
Fold dough over filling to create half-moon shape. Press edges together firmly to seal.
For traditional shape, pinch and twist edges in small pleats, working from one end to other. Or simply press with fork tines to seal.
Place sealed piroshki seam-side down on parchment-lined baking sheet, spacing 2 inches apart.
Sealing is Critical: Poorly sealed piroshki leak during cooking. Make sure edges are thoroughly sealed.
Step 6: Second Rise (Baking Method)
Cover shaped piroshki with towel and let rest for 15-20 minutes. They’ll puff up slightly.
Preheat oven to 375°F (190°C) during this time.
Step 7: Bake or Fry
Baking Method (Recommended): Brush piroshki with beaten egg wash for golden color.
Bake at 375°F for 15-20 minutes until deep golden brown.
Let cool for 5 minutes before serving.
Frying Method: Heat 2 inches of vegetable oil in deep pot or skillet to 350°F (175°C).
Fry piroshki in batches, 2-3 minutes per side, until deep golden brown.
Drain on paper towel-lined plate.
Temperature Matters: Too hot = burnt outside, raw inside. Too cool = greasy, soggy piroshki.
Expert Tips for Perfect Piroshki
Warm Ingredients: Warm milk and water activate yeast properly. Cold liquids create dense dough.
Knead Properly: 5-7 minutes kneading develops gluten for soft, elastic dough.
Cool Filling Completely: Hot filling makes dough hard to work with and can kill yeast.
Don’t Overfill: Use 1-1.5 tablespoons filling max. More causes bursting.
Seal Thoroughly: Press edges firmly together. Test seal by gently pulling—it shouldn’t open.
Even Sizing: Uniform pieces ensure even cooking and professional appearance.
Egg Wash for Color: Don’t skip this step when baking—it creates beautiful golden crust.
Frying Temperature: Use thermometer for accurate oil temperature. Consistency matters!
Storage and Freezing Instructions
Room Temperature: Store baked piroshki in airtight container for 2 days. Best eaten fresh.
Refrigerator: Refrigerate in airtight container for up to 4 days. Reheat in 350°F oven for 10 minutes or microwave 30-60 seconds.
Freezing (Unbaked): Arrange shaped, uncooked piroshki on baking sheet and freeze until solid (2 hours). Transfer to freezer bags for up to 3 months. Bake from frozen, adding 5-10 minutes to baking time.
Freezing (Baked): Cool completely, freeze in single layer, then store in freezer bags up to 2 months. Reheat from frozen at 350°F for 15-20 minutes.
Reheating: Oven reheating maintains best texture. Microwave works but may soften crust.
Creative Filling Variations
Meat Variations
- Chicken: Ground chicken with herbs
- Pork: Ground pork with cabbage
- Lamb: Spiced lamb with mint
- Mixed Meat: Half beef, half pork (traditional)
Vegetarian Fillings
- Potato & Cheese: Mashed potato with cheese and dill
- Cabbage: Sautéed cabbage with caraway seeds
- Mushroom: Mixed mushrooms with onions and thyme
- Spinach & Cheese: Sautéed spinach with feta
- Egg & Rice: Chopped hard-boiled eggs with cooked rice
Sweet Fillings
- Apple: Diced apples with cinnamon and sugar
- Cherry: Sweet or sour cherries with sugar
- Farmer’s Cheese: Sweetened tvorog (Russian cottage cheese)
- Berry: Mixed berries with cornstarch and sugar
Flavor Enhancements
- Herbs: Add dill, parsley, or cilantro to meat filling
- Spices: Cumin, paprika, or coriander for depth
- Cheese: Add shredded cheese to meat filling
- Vegetables: Mix in carrots, peas, or bell peppers
Serving Suggestions
Traditional Russian Style
- With Sour Cream: Classic accompaniment for dipping
- Alongside Borscht: Serve with beet soup
- With Tea: Traditional Russian tea service
- Pickled Vegetables: Cucumbers or cabbage on the side
Modern Serving Ideas
- Dipping Sauces: Ranch, marinara, garlic aioli, or hot sauce
- Fresh Salad: Light greens with vinaigrette
- Soup: Any hearty soup pairs well
- Party Platter: Arrange with various dipping sauces
Beverage Pairings
- Hot Tea: Traditional Russian black tea
- Kvass: Fermented rye bread beverage
- Beer: Light lager or wheat beer
- Red Wine: Light-bodied red
Frequently Asked Questions
Can I use active dry yeast instead of instant? Yes! Dissolve active dry yeast in warm milk/water mixture with sugar. Let sit 5-10 minutes until foamy, then proceed with recipe.
Why is my dough not rising? Common causes: liquid too hot (killed yeast), liquid too cold (didn’t activate yeast), or expired yeast. Ensure liquids are 110°F.
Can I make dough in advance? Yes! After first rise, punch down, wrap tightly, and refrigerate up to 24 hours. Bring to room temperature before shaping.
My piroshki burst open while cooking. Why? Either overfilled, not sealed properly, or filling was too hot when assembling. Use less filling and seal edges thoroughly.
Can I bake instead of fry (or vice versa)? Absolutely! Both methods work. Baking is lighter; frying creates crispier exterior. Choose based on preference.
How do I know when fried piroshki are done? Deep golden brown color on both sides, and they’ll float in oil. Internal temperature should reach 190°F.
Can I make these gluten-free? Difficult with yeast dough, but you could try gluten-free flour blend designed for bread. Texture will differ.
What’s the best way to reheat? Oven at 350°F for 10-15 minutes for best texture. Microwave works but softens crust.
Why This Recipe Works
This piroshki recipe succeeds because the yeast dough is enriched with egg and oil, creating tender texture that’s not too heavy or bread-like. The sugar feeds the yeast while adding subtle sweetness that balances savory filling.
Properly kneaded dough develops gluten structure that’s strong enough to hold filling without tearing, yet tender enough to bite through easily. The two rises allow flavor development and create light, airy texture.
Cooling the filling completely prevents the dough from becoming soggy or difficult to handle. The beef and onion combination is classic for good reason—onions add sweetness and moisture while beef provides hearty, savory flavor.
Brushing with egg wash before baking creates appealing golden color and slight sheen. The proteins in egg create barrier that helps seal in moisture while crisping exterior.
Nutritional Information (Per Piroshki, Makes 12)
- Calories: 210
- Total Fat: 10g
- Saturated Fat: 3g
- Carbohydrates: 18g
- Fiber: 1g
- Sugar: 1g
- Protein: 12g
Nutritional values are approximate. Fried version will have higher fat/calories.
Authentic Russian Piroshki | Savory Meat Hand Pies (Baked or Fried!)
Equipment
- Mixing bowls
- Skillet
- Baking sheet
- Parchment paper
- Rolling Pin
- Deep frying pan or Dutch oven (optional for frying)
Ingredients
- 2 cups (250 g) all-purpose flour, plus extra for dusting
- 1/2 tsp salt
- 1 tsp sugar
- 2 tsp instant yeast (or active dry yeast)
- 1/2 cup (120 ml) warm milk (≈110°F / 43°C)
- 1/4 cup (60 ml) warm water (≈110°F / 43°C)
- 1/4 cup (60 ml) vegetable oil
- 1 large egg
- 1 lb (450 g) ground beef (or half beef, half pork)
- 1 small onion, finely chopped
- 1/2 cup (75 g) mushrooms, finely chopped (optional)
- 1 tbsp butter
- Salt and black pepper, to taste
- 1 clove garlic, minced (optional)
- 1 tsp fresh dill, chopped (optional)
- 1 egg beaten, for egg wash (baked version)
- Vegetable oil, for frying (if using fry method)
Instructions
- In a large bowl, combine flour, salt, sugar, and instant yeast. Add warm milk, water, vegetable oil, and egg. Mix until dough forms, then knead 5–7 minutes until smooth and elastic. If sticky, add flour 1 tbsp at a time.
- Place dough in lightly oiled bowl, cover, and let rise in warm spot for 1 hour or until doubled in size.
- In a skillet, melt butter and sauté onion 3–4 minutes. Add mushrooms if using and cook until moisture evaporates. Add ground beef, salt, and pepper. Cook 8–10 minutes until browned. Stir in garlic and dill if desired. Cool completely.
- Punch down dough and divide into 12 equal pieces (≈60 g each). Roll each into ball, flatten into 4-inch circle, and add 1 tablespoon cooled filling in center.
- Fold dough over filling to form a half-moon. Seal edges tightly by pinching or pressing with fork. Place seam-side down on parchment-lined tray.
- Cover shaped piroshki and rest 15–20 minutes. Preheat oven to 375°F (190°C).
- To bake: Brush tops with egg wash and bake 15–20 minutes until golden. To fry: Heat oil to 350°F (175°C) and fry 2–3 minutes per side until golden and cooked through.
- Cool slightly before serving. Enjoy warm with sour cream, tea, or alongside borscht.