This post may contain affiliate links. As an Amazon Associate, we earn from qualifying purchases. We only recommend products we trust.
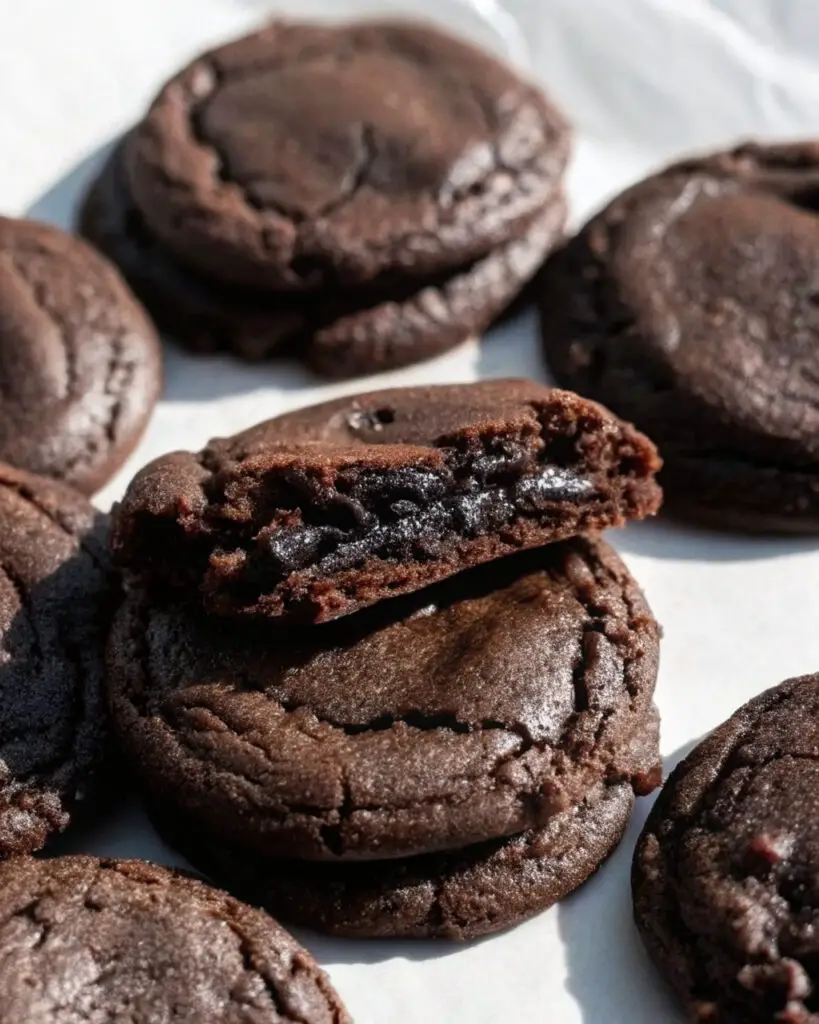
Take your baking game to the next level with these absolutely stunning Sourdough Brownie Cookies. This recipe uses a classic, reliable melted dark chocolate base, which we divide, tint with active sourdough discard, and gently whisk into a thick, glossy batter to create a beautiful, watercolor effect. The result is a delicious, buttery cookie that holds its fudgy center perfectly and requires no further decorating (though a sprinkle of sea salt is a perfect finish!).
This technique is incredibly fun and surprisingly easy, giving you the best of both worlds: a great-tasting decadent brownie and a beautiful, festive visual. Unlike techniques that rely on long fermentations, this “discard” method uses your sourdough starter right out of the fridge, making these chewy treats an elegant and simple option for your loved ones.
Perfect for holiday gift boxes, sourdough enthusiasts, or romantic dessert recipes for date night, these brownie cookies combine professional pastry-shop appearance with homemade love.
Table of Contents
Why You’ll Love This Sourdough Brownie Cookie Recipe
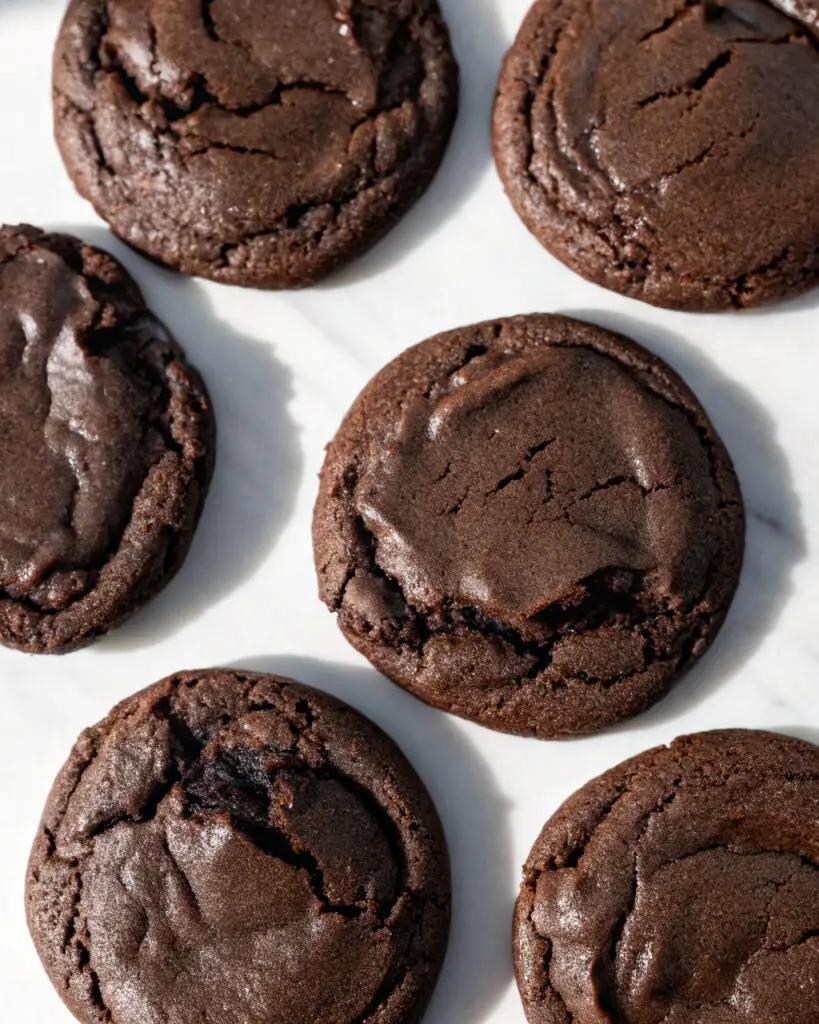
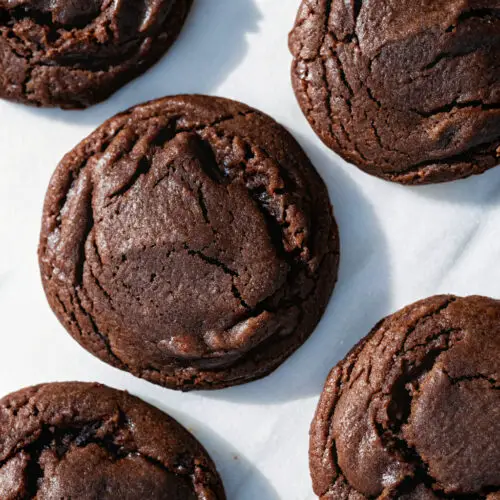
Stunning Visual: The gentle mixing of the melted chocolate and the bubbly sourdough discard creates a unique, artful marbled effect and a shimmering, “paper-thin” crackled top on every cookie.
Flavor-Lock Guarantee: The recipe is formulated with the natural acidity of sourdough to maintain a complex, deep chocolate flavor, essential for perfect professional-style brownie cookies.
Fun to Make: The process of watching your sourdough discard disappear into the rich chocolate batter is a wonderful, meditative activity—ideal for therapeutic weekend baking.
Classic Flavor: A simple, savory-sweet intense cacao and tangy sourdough base that everyone loves.
No Chilling Required: Unlike traditional sourdough bread, these must be baked immediately while the batter is shiny for the best visual results.
Ingredients for Sourdough Brownie Cookies
- 1 cup Semi-Sweet Chocolate Chips or Chopped Bar (melted)
- 4 tbsp Unsalted Butter (melted with the chocolate)
- 1 large Egg (room temperature)
- ½ cup Sourdough Discard (active or unfed)
- ¾ cup Light Brown Sugar (packed)
- ¼ cup Granulated Sugar
- 1 tsp Vanilla Extract
- ½ cup All-Purpose Flour
- 2 tbsp Dutch-Processed Cocoa Powder
- ½ tsp Baking Powder
- Flaky Sea Salt (like Maldon) for topping
Best Ingredients for Brownie Cookies
For the most vibrant results in your chocolate-tinted creations, use high-quality chocolate with at least 60% cacao. Professional brands produce the most consistent melt without adding excess fillers to your batter. Premium Dutch-processed cocoa or black cocoa can be added for variation, and high-quality sea salt flakes elevate the flavor profile significantly.
Instructions (Step-by-Step): How to Make Sourdough Brownie Cookies
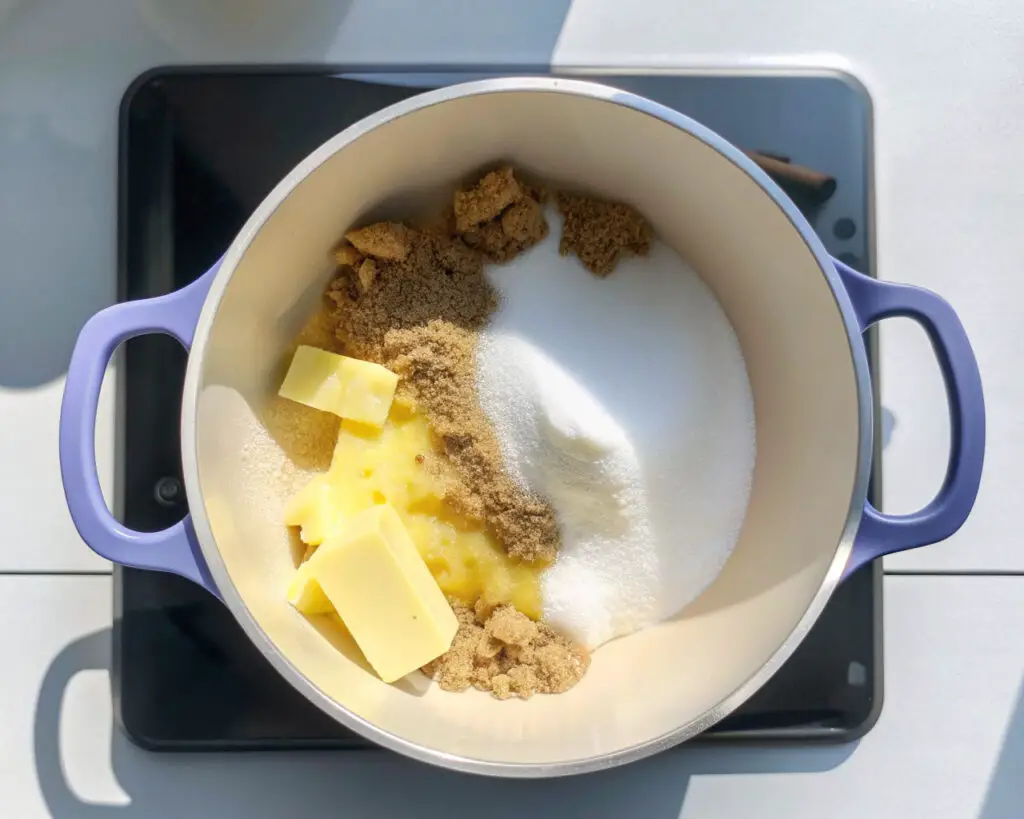
Step 1: Prep Chocolate Base Preheat your oven to 350°F. In a small microwave-safe bowl, melt the chocolate and butter together in 30-second increments. Stir until it is a vibrant, glossy, and smooth chocolate—just enough until no lumps are visible. Set aside to cool slightly. This provides the deep mahogany tint to our cookie base.
Step 2: Divide and Tint (The Sourdough Mixture) In a large bowl, beat the egg and both sugars on high speed for 5 minutes until pale and thick. Gently whisk in the sourdough discard and vanilla. This provides the pale golden-white tint to our base and creates the “meringue” structure.
Step 3: Create Marbled Effect (The Fold) Gently fold the melted chocolate mixture into the sourdough-egg mixture. Sift in the flour, cocoa powder, and baking powder. Mix—just enough until swirls of dark and light are visible and the batter is a bouquet of chocolatey goodness. This is the key technique for achieving stunning glossy depth.
Step 4: Scoop (The “Immediate” Step) Using a cookie scoop, drop rounds of batter onto a lined baking sheet. Do not let the batter sit; we want it to hit the heat while it is still glossy. This is essential for a great-tasting, crackled set and a beautiful visual.
Step 5: Salt (The “Butter” Step) Immediately before placing in the oven, sprinkle the top with flaky sea salt. This is essential for a professional finish and a beautiful glistening visual against the dark chocolate.

Step 6: Bake (Crucial Step) Bake for 10–12 minutes. This is the best way to prevent overcooking and guarantee perfect, restaurant-quality fudgy centers. The edges should be set, but the center will still look soft.
Step 7: Cool and Serve Allow the cookies to cool on the pan for 10 minutes. This final rest is the best way to allow the “crackle” to fully develop. The contrast of the shimmering skin against the dark fudgy interior creates a beautiful finish.
Storage and Expert Tips for Professional Brownie Cookies
Essential Tips:
Whisking Time is Required: A full 5 minutes of high-speed beating (Step 2) is non-negotiable for this recipe. A quick stir will add too little air to the batter, causing the cookies to be flat and greasy.
Do Not Overwork the Batter: When folding in the dry ingredients (Step 3), stop as soon as the flour streaks disappear. The goal is to see a distinct shiny surface, not a uniform matte texture.
Sourdough Discard Consistency: Ensure your discard is at room temperature. The more you balance the temperatures, the better the final visual and texture will be.
Immediate Baking is Gold: Even if you have multiple trays, scoop and bake them as fast as possible. The brief wait time (if the batter sits) is the common reason for losing the shiny meringue top.
Temperature Control: Use room-temperature eggs. Cold eggs will “seize” the melted chocolate in the batter, while room-temperature eggs allow the fats to incorporate perfectly.
Storage Instructions: Store the cookies in an airtight container at room temperature for up to 3 days. For longer storage, freeze the baked cookies for up to 2 months. Reheat in a 300°F oven for 2 minutes to restore the “fresh-baked” fudgy texture.
Creative Variations for Decadent Desserts
Espresso Infusion Elegance Add a teaspoon of instant espresso powder to the chocolate base for a shimmering finish perfect for adult dinner parties.
White Chocolate Swirl Fold in white chocolate chips along with the dry ingredients for a more complex color profile that mimics high-end artisan creations.
Bourbon Sourdough Variation Add 1 tablespoon of bourbon to the batter for a rich, wood-fired flavor profile that pairs perfectly with the dark chocolate.
Walnut and Caramel Infusion Add chopped walnuts and a drizzle of caramel sauce to the center. This adds richness while showcasing the beautiful dark mahogany pattern underneath.
Best Baking Tools and Pantry Supplies for Brownie Cookies
Transform your easy dessert creations into professional-quality treats with the right pantry supplies. Here’s what works best:
Top Choice Ingredients:
- 60% Dark Chocolate: For a dark, extra-rich theme that adds chocolatey charm
- Dutch Cocoa: For varying levels of deep brown and amber dimension
- Maldon Sea Salt: For an upscale, shimmering presentation
- Brown Butter: Swap melted butter for browned butter for a deeper amber tint
- Vanilla Bean Paste: For sparkling, speckled edges in the dough
Essential Baking Tools:
- Electric Stand Mixer: Invest in a high-power mixer for maximum air incorporation
- Silicone Baking Mat: Ensures you can remove the cookies without distortion
- Cookie Scoop: Perfect for portioning uniform glossy rounds without damage
- Fine Mesh Sieve: Essential for sifting cocoa powder to prevent lumps
Sourdough Brownie Cookies
Equipment
- Electric mixer
- microwave-safe bowl or small saucepan
- Cookie Scoop
- Baking sheet
Ingredients
- 1 cup chocolate chips or chopped chocolate bar
- 4 tbsp butter
- 1 egg
- 0.5 cup sourdough discard
- 0.75 cup brown sugar
- 0.25 cup granulated sugar
- 0.5 cup all-purpose flour
- 2 tbsp cocoa powder
- 1 tsp vanilla extract
- 0.5 tsp baking powder
- 0.25 tsp sea salt
- flaky sea salt for topping (optional)
Instructions
- Preheat oven to 350°F (175°C) and line a baking sheet with parchment paper.
- Melt the chocolate and butter together in a microwave-safe bowl or small saucepan, stirring until smooth. Let cool slightly.
- Using a mixer, beat the egg, brown sugar, and granulated sugar on high speed for about 5 minutes until thick, pale, and fluffy.
- Whisk in the sourdough discard and vanilla extract until smooth.
- Fold the melted chocolate mixture gently into the whipped egg mixture.
- Fold in the flour, cocoa powder, baking powder, and sea salt until a glossy batter forms.
- Immediately scoop batter onto the prepared baking sheet using a cookie scoop, spacing cookies about 2 inches apart.
- Sprinkle with flaky sea salt if desired and bake for 10–12 minutes until edges are set but centers remain soft.
- Allow cookies to cool on the pan for 10 minutes to let the crackle tops set before transferring to a cooling rack.
Notes
Frequently Asked Questions About Sourdough Brownie Cookies
Q: Why didn’t I get the shiny crackle top? A: You likely didn’t beat the egg and sugar long enough! Whisk for a full 5 minutes until the mixture is thick and pale.
Q: Can I use active starter instead of discard? A: Yes! Both work perfectly. The active starter may give a slightly fluffier lift, while discard provides a deeper tang.
Q: How long will the cookies stay fresh? A: Store in an airtight container for up to 3 days. They actually taste better the next day as the sourdough flavor matures.
Q: Can I make these without a mixer? A: Not easily. Achieving the necessary air in the eggs by hand takes incredible effort. For the best visual results, an electric mixer is essential.
Q: Are these suitable as no-cook treats? A: No, the raw flour and egg must be baked to a safe temperature. However, the total active time is under 15 minutes.