This post may contain affiliate links. As an Amazon Associate, we earn from qualifying purchases. We only recommend products we trust.
Imagine biting into a slice of perfectly creamy cheesecake that tastes like a tropical vacation. Now imagine the bright, tangy guava compote on top that makes it absolutely unforgettable. This creamy guava cheesecake is exactly that—a show-stopping dessert that looks fancy but is surprisingly simple to make at home.
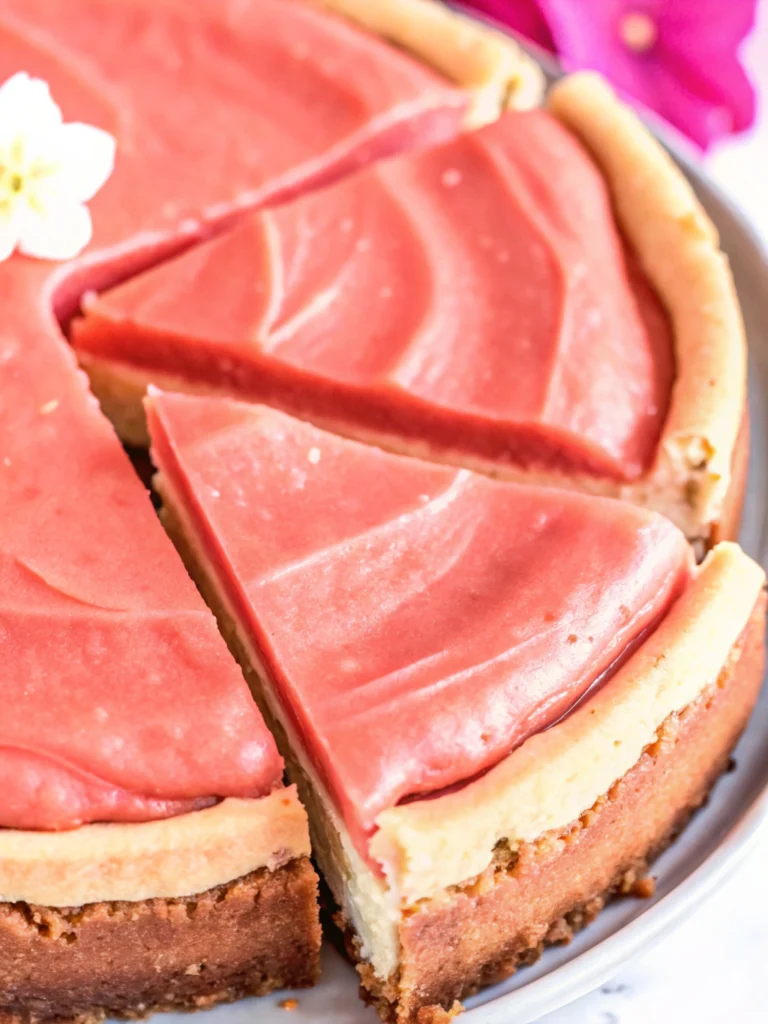
Whether you’re celebrating with family, impressing dinner guests, or just treating yourself on a Friday night, this tropical cheesecake will become your go-to recipe. The silky smooth vanilla cheesecake paired with the vibrant, fresh guava topping is pure magic. Best part? No cracks, no stress, just delicious results!
Table of Contents
Why You’ll Love This Recipe
✨ Creamy, Restaurant-Quality Texture – Using a water bath method ensures your cheesecake stays silky smooth, not dry or rubbery
🌴 Tropical Flavor Profile – Fresh guava compote with lime juice brings bright, sophisticated flavors that feel special
⏱️ Simple Ingredients – No fancy equipment needed! Just cream cheese, eggs, sugar, and fresh guavas
🎂 Impressive Yet Easy – Looks like you spent hours in the kitchen, but truly beginner-friendly
❄️ Make-Ahead Friendly – Prepare the day before serving (or freeze up to 1 month ahead)
👨👩👧👦 Perfect for Any Occasion – Holidays, dinner parties, anniversaries, Mother’s Day brunch, or just because
💪 No Cracks Guaranteed – Our water bath technique prevents those frustrating cracks while baking
Equipment You’ll Need
- One 9-inch (23cm) springform cake pan
- Food processor (or blender)
- Electric mixer (hand mixer works too!)
- Roasting pan (larger than your cake tin)
- Medium saucepan
- Mixing bowls
- Rubber spatula
- Measuring cups and spoons
- Fine-mesh sieve (for straining compote seeds)
Pro Tip: A springform pan is key here—the removable sides make it easy to remove your beautiful finished cheesecake without damage.
Ingredients
For the Vanilla Cheesecake Base
Crust:
- 300g (10.5 oz / about 2 cups) plain butter biscuits (tennis biscuits, digestive biscuits, or graham crackers)
- 150g (5.3 oz / 10 tbsp) unsalted butter, melted
- 2 tbsp granulated sugar
- Pinch of sea salt
Cheesecake Filling:
- 700g (1.5 lbs / 3 packages) full-fat cream cheese, softened to room temperature
- 250g (8.8 oz / 1¼ cups) caster sugar (or granulated sugar)
- 4 large eggs, room temperature
- 1 tsp vanilla bean paste (or vanilla extract)
- 200ml (6.8 oz / ¾ cup + 2 tbsp) heavy whipping cream, cold
- 200g (7 oz) fresh guavas, thinly sliced for garnish
For the Fresh Guava Compote
- 500g (1.1 lbs / about 4 medium) fresh, ripe guavas, peeled and chopped
- 80g (2.8 oz / ⅜ cup + 1 tbsp) white granulated sugar
- 1 tbsp fresh lime juice
- ½ tsp vanilla extract (optional, but adds depth)
Shopping Tip: Choose guavas that yield slightly to pressure—they should be fragrant and sweet, not hard. Taste a small piece before using!
Instructions: How to Make Creamy Guava Cheesecake
Preparation (10 minutes)
Step 1: Prepare Your Pan Preheat oven to 170°C (325°F). Spray a 9-inch springform pan with non-stick baking spray. Line the bottom with parchment paper. This prevents sticking and makes removal easier.
Step 2: Seal with Foil Tear off heavy-duty aluminum foil and create a seal around the bottom and sides of the springform pan. This is your water-proof barrier—take time to seal it properly so water doesn’t seep into your cheesecake. This is the secret to avoiding a watery mess!
Step 3: Gather Ingredients at Room Temperature This step matters more than you’d think. Pull out your cream cheese, eggs, and whipping cream 1-2 hours before starting. Room temperature ingredients blend smoothly and create a lump-free filling.
Making the Crust (5 minutes)
Step 4: Crush the Biscuits Add your biscuits to a food processor and pulse until fine crumbs form (no chunks!). Alternatively, place them in a sealed bag and crush with a rolling pin. You should have about 1½ cups of crumbs.
Step 5: Mix the Crust In a large bowl, combine biscuit crumbs, melted butter, 2 tbsp sugar, and a pinch of salt. Stir until the mixture resembles wet sand—every crumb should be moistened with butter.
Step 6: Press into Pan Pour the mixture into your prepared springform pan. Using the bottom of a measuring cup or the back of a spoon, press firmly into the bottom and ¾ of the way up the sides of the pan. Create an even thickness—this ensures even baking.
Step 7: Pre-Bake the Crust Bake the crust alone for 10 minutes until lightly golden and fragrant. This helps it stay crispy once the filling is added. Remove and let cool slightly.
Making the Creamy Filling (15 minutes)
Step 8: Beat Cream Cheese and Sugar In your electric mixer bowl (with paddle attachment), add the room-temperature cream cheese and caster sugar. Beat on medium speed for 2-3 minutes until completely smooth and creamy. Stop occasionally to scrape down the sides of the bowl with a rubber spatula. This creates a lump-free base—don’t rush this step!
Step 9: Add Eggs One at a Time With the mixer running on medium speed, add one egg at a time. After each egg, scrape down the sides and mix until fully incorporated before adding the next. This takes about 3-4 minutes total. Do not overmix once all eggs are in—overmixing incorporates too much air, which causes cracks.
Step 10: Add Vanilla and Cream Add vanilla bean paste and pour in the cold whipping cream. Beat on medium-high speed for about 2 minutes until the mixture is light, fluffy, and pale. You want it creamy but not whipped to stiff peaks.
Step 11: Pour into Crust Gently pour the filling over your pre-baked crust, smoothing the top with a spatula. Tap the pan gently on the counter 2-3 times to release any air bubbles.
The Water Bath Method (50 minutes)
Step 12: Prepare the Water Bath This is the secret to a crack-free, creamy cheesecake. Place your foil-sealed springform pan inside a larger roasting pan. Set both in the oven.
Step 13: Fill with Hot Water Carefully pour hot water into the roasting pan (not into the cheesecake!) until the water reaches about halfway up the sides of the springform pan. The water temperature should be hot—use water that just boiled or is very hot from the tap.
Step 14: Bake Low and Slow Bake at 170°C (325°F) for 50 minutes. The cheesecake is done when:
- The center still jiggles slightly (about 2-inch diameter in the middle)
- The edges are set and pulled away slightly from the pan
- A toothpick inserted 2 inches from center comes out mostly clean (a few crumbs are okay)
Critical Step 15: Gradual Cooling Turn off the oven. Crack the oven door open about 2 inches and let the cheesecake sit in the cooling oven for 2 hours. This gradual temperature change prevents the dreaded cracks. Yes, 2 hours! This is non-negotiable for perfection.
Step 16: Refrigerate Overnight Remove the cheesecake from the oven and water bath. Wrap the top tightly with plastic wrap. Refrigerate for at least 8 hours or overnight. This allows the texture to set fully and flavors to develop.
Making the Guava Compote (20 minutes active, plus cooling)
Step 17: Cook the Guavas In a medium saucepan over medium heat, combine chopped guavas, lime juice, and sugar. Stir occasionally as the mixture heats. The sugar will melt and the guavas will begin releasing their juice (about 5-7 minutes).
Step 18: Reduce and Thicken Continue cooking for 8-12 minutes, stirring occasionally, until the mixture becomes thick, jam-like, and darker in color. The liquid should reduce by about half. This concentrates the flavor beautifully.
Step 19: Cool Completely Pour the hot compote into a glass jar or bowl. Let it cool to room temperature, about 20-30 minutes. This allows the flavors to set and makes it easier to blend.
Step 20: Blend and Strain Transfer cooled compote to a food processor and pulse until smooth. Pour through a fine-mesh sieve, pressing gently with the back of a spoon to remove all seeds. This creates a smooth, elegant texture. If it’s too thick, whisk in 1-2 tbsp hot water.
Step 21: Chill Before Serving Refrigerate the compote until serving time. You want it cold against the warm cheesecake.
Final Assembly and Serving
Step 22: Remove from Pan Run a thin-bladed knife around the edges of the cheesecake (inside the springform) to loosen it. Unlock and remove the springform sides carefully.
Step 23: Transfer to Serving Plate Slide a thin spatula under the cheesecake and transfer it to your serving plate. (Or serve directly from the springform bottom—your choice!)
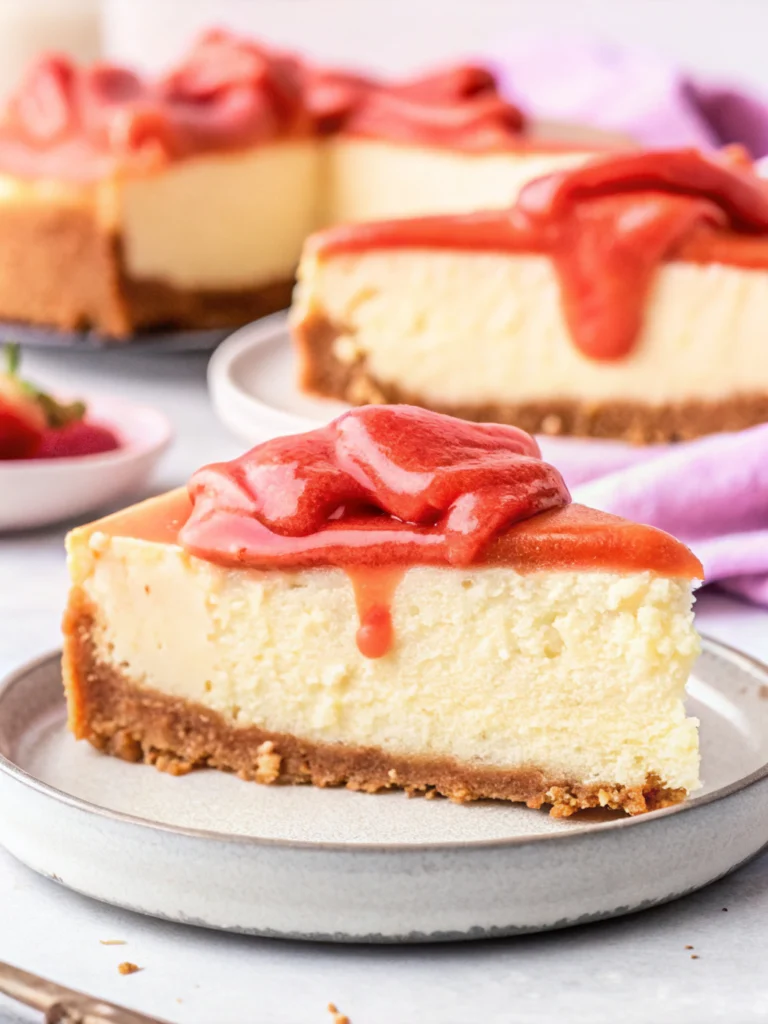
Step 24: Top and Garnish Spoon the chilled guava compote generously over the top of the cheesecake. Arrange fresh guava slices on top for a beautiful presentation. Add a sprig of fresh mint if desired.
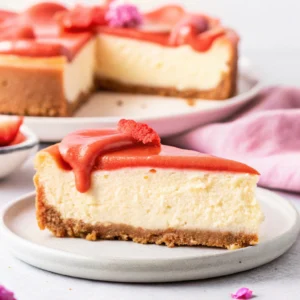
Step 25: Slice and Serve Using a warm, wet knife, cut the cheesecake into 12 equal slices. Wipe the knife clean between cuts for neat slices. Serve immediately.
Serving Suggestions
🍰 Classic Presentation – Serve at room temperature with fresh guava compote on top, garnished with thin guava slices and fresh mint
❄️ Chilled and Light – For summer, serve directly from the refrigerator with a dollop of whipped cream on the side
🥄 With Whipped Cream – Top each slice with lightly whipped cream flavored with a touch of lime zest
🍷 Pairing Ideas:
- Crisp white wine like Sauvignon Blanc or Pinot Grigio
- Light herbal tea or chamomile
- Strong espresso or cappuccino
- Sparkling lime water for a non-alcoholic option
🎉 Occasion Ideas:
- Summer dinner party centerpiece
- Mother’s Day or Father’s Day dessert
- Birthday celebration
- Tropical-themed brunch
- Date night at home
💡 Plating Pro Tip: Let cheesecake sit at room temperature for 15-20 minutes before serving for the best flavor and texture. Cold cheesecake tastes muted; room temperature brings out all those creamy, tangy notes!
Easy Variations & Substitutions
Different Fruit Toppings
If fresh guavas aren’t available (they’re seasonal!), you can make this cheesecake with:
🫐 Blueberry Compote – Use 500g fresh blueberries, 80g sugar, and 1 tbsp lemon juice instead. Skip the straining step since blueberries don’t have seeds.
🍓 Strawberry Compote – Use fresh strawberries, sugar, and lime juice. Cook until thick, blend, and don’t strain (seeds are edible and pretty).
🫐 Mixed Berry Compote – Combine raspberries, blackberries, and blueberries for a stunning presentation.
🍋 Passion Fruit Curd – For something different, use store-bought passion fruit curd or homemade curd instead of compote.
🍑 Mango Compote – Ripe mango with coconut cream makes a dreamy alternative.
Crust Variations
Coconut Crust – Replace ½ of the biscuits with shredded coconut for tropical flair Almond Crust – Mix in ¼ cup finely ground almonds with the biscuit crumbs Vanilla Wafer Crust – Use vanilla wafers instead of plain biscuits for a sweeter base
Cheesecake Flavors
Coconut Cheesecake – Replace whipping cream with coconut cream; reduce vanilla to ½ tsp and add ½ tsp coconut extract Lime Cheesecake – Add 2 tbsp fresh lime juice and 1 tbsp lime zest to the filling Honey Cheesecake – Replace ½ of the sugar with honey; add a touch of vanilla extract
Expert Tips for Perfect Results
🌡️ Temperature is Everything
- Room temperature ingredients blend smoothly without lumps or streaks
- An oven thermometer ensures you’re actually at 325°F (some ovens run hot or cold)
- Water bath temperature matters—use hot water, not cool water
🔐 The Foil Seal is Critical
- A loose foil seal = water seeping into your cheesecake
- Tear foil large enough and mold it carefully around the bottom and up the sides
- Double-layer the foil for extra protection if your pan is wobbly
⏱️ Timing is Non-Negotiable
- The 2-hour gradual cooling in the oven prevents stress cracks
- Overnight refrigeration isn’t optional—it sets the texture and develops flavor
- Don’t skip steps or rush the process for best results
🥚 Egg Quality Matters
- Use large, fresh eggs at room temperature
- Cold eggs don’t incorporate smoothly and can create a dense texture
- Extra-large eggs may require slightly longer baking time
🧈 Cream Cheese Tips
- Always use full-fat cream cheese (Philadelphia brand is reliable)
- Don’t use fat-free or reduced-fat versions—they won’t achieve the same creamy texture
- Softening it completely takes 1-2 hours; you can gently heat in the microwave for 15-20 second bursts if rushed
🍒 Guava Selection
- Taste your guavas before using—they should be sweet and fragrant
- Over-ripe guavas are too soft for this recipe; slightly firm but yielding is ideal
- If your area doesn’t have fresh guavas, frozen guavas work (thaw and drain excess liquid first)
✨ Smooth Blending Without Overmixing
- Once all ingredients are combined, don’t beat the batter excessively
- Too much air whipped in = more cracks while baking
- Mix until just combined; stop the moment everything looks uniform
🌟 Preventing Cracks
- Use a water bath (non-negotiable!)
- Ensure oven is properly sealed with foil
- Don’t open the oven during baking
- Allow gradual cooling in the oven
- Don’t overbake—cheesecake should have slight jiggle in center
Storage & Make-Ahead Guide
Refrigerator Storage
- Store in an airtight container or covered with plastic wrap
- Keeps fresh for 4-5 days
- Best flavor on days 2-3 after making (flavors meld together)
Freezer Storage
- Do NOT freeze with compote on top – freeze them separately
- Wrap plain cheesecake tightly in plastic wrap, then aluminum foil
- Freeze for up to 1 month
- Thaw in refrigerator overnight before serving
- Freezer compote separately in an airtight freezer-safe container
- Thaw compote in refrigerator for 2 hours before serving
Prepare-Ahead Timeline
2 Days Before:
- Make the cheesecake (Steps 1-16)
- Store in fridge
1 Day Before:
- Make the guava compote (Steps 17-20)
- Store in fridge until ready to serve
Day Of:
- Remove cheesecake from fridge 15 minutes before serving
- Assemble and garnish just before serving for best presentation
Frequently Asked Questions
Q: Why is my guava cheesecake rubbery or dense? A: This usually means one of three things: (1) Your oven temperature was too high—invest in an oven thermometer; (2) You skipped the water bath—don’t! It’s essential; or (3) You overbaked it—the center should still jiggle slightly when done.
Q: My cheesecake has a big crack down the middle. Did I ruin it? A: It’s not ruined, just not picture-perfect! While cracks aren’t ideal, they still taste delicious. For future batches: use a water bath, ensure the foil seal is tight, let it cool gradually in the oven, and don’t overbake. The compote topping will cover any minor cracks beautifully!
Q: Can I use frozen guavas? A: Yes! Thaw them completely, drain excess liquid, and proceed with the recipe. Fresh is ideal for texture, but frozen works well for compote.
Q: What if I can’t find tennis biscuits? A: Digestive biscuits, graham crackers, vanilla wafers, or even Oreos (without filling) work great. Just make sure they’re plain and not too sweet.
Q: Can I make this without a springform pan? A: A springform pan is really the best option for removing the cheesecake intact. In a pinch, a regular 9-inch cake pan works, but you’ll need to invert it onto a plate to serve—risky! Get a springform pan; they’re inexpensive and invaluable for cheesecake.
Q: Do I have to use a water bath? A: YES. This is not optional if you want a creamy texture. The water bath insulates the cheesecake, preventing the edges from overcooking while the center bakes gently. Without it, you’ll get a rubbery, cracked disaster.
Q: How far in advance can I make this? A: Up to 1 month ahead if frozen separately from compote! Or make it 4-5 days before serving (keeping it refrigerated). The flavor actually improves on day 2-3 as flavors meld.
Q: My cheesecake didn’t set. What went wrong? A: It likely didn’t bake long enough, or your oven runs cool. Let it sit in the fridge longer (overnight minimum), and use an oven thermometer next time. Sometimes a slightly jiggly center firms up more as it cools and chills.
Q: Can I use a different fruit than guava? A: Absolutely! Passion fruit, mango, raspberry, strawberry, or mixed berry all work beautifully. Follow the same compote method.
Q: Is this recipe naturally dairy-free or vegan? A: No, this recipe uses cream cheese, eggs, and heavy cream—all dairy. Vegan and dairy-free versions would require ingredient substitutions beyond the scope of this recipe.
Q: Can I add guava flavoring to the cheesecake itself instead of using a topping? A: You can! Add guava puree to the filling before baking, but reduce the whipping cream slightly to compensate for added liquid. The result will be a guava-flavored cheesecake with a simpler preparation.
Creamy Guava Cheesecake with Fresh Compote
Equipment
- springform pan
- Mixing bowl
- Electric mixer
- baking tray (for water bath)
- Saucepan
- Blender
Ingredients
- 300 g plain biscuits
- 150 g butter, melted
- 2 tbsp sugar (for crust)
- 700 g cream cheese
- 250 g sugar
- 4 eggs
- 1 tsp vanilla extract
- 200 ml heavy cream
- 500 g fresh guavas
- 80 g sugar (for compote)
- 1 tbsp lime juice
Instructions
- Crush biscuits and mix with melted butter and sugar. Press into a springform pan and bake at 350°F (175°C) for 10 minutes.
- Beat cream cheese and sugar until smooth and creamy.
- Add eggs one at a time, mixing well after each addition. Stir in vanilla and cream.
- Pour the filling over the crust and smooth the top.
- Bake in a water bath at 325°F (163°C) for 50 minutes until set but slightly jiggly in the center.
- Turn off oven and let cheesecake cool inside for 2 hours, then refrigerate overnight.
- Cook guavas with sugar and lime juice until soft. Blend and strain into a smooth compote.
- Top chilled cheesecake with guava compote before serving.