This post may contain affiliate links. As an Amazon Associate, we earn from qualifying purchases. We only recommend products we trust.
When you’re looking for a dessert that is pure comfort, look no further than this old-fashioned, Pioneer Woman-style apple crisp. This is The Best Apple Crisp Recipe for anyone who loves a hearty, rustic dessert that’s bursting with flavor. It’s a fantastic recipe to use up apples from the orchard, featuring a warm, gooey filling of tender, spiced apples under a thick blanket of a crunchy, buttery oat topping. Unlike a more complicated Pioneer Woman Cobbler Recipe, this is a simple, one-dish wonder. This Easy Crisp Recipe is a true crowd-pleaser and the epitome of cozy, homestyle baking.
This timeless American dessert has been gracing family tables for generations, bringing people together with its irresistible aroma and soul-warming flavors. Perfect for autumn gatherings, holiday celebrations, potluck dinners, or any time you want to fill your home with the comforting scent of cinnamon and baked apples. Whether you’re a seasoned baker or a kitchen novice, this foolproof recipe delivers bakery-quality results every single time.
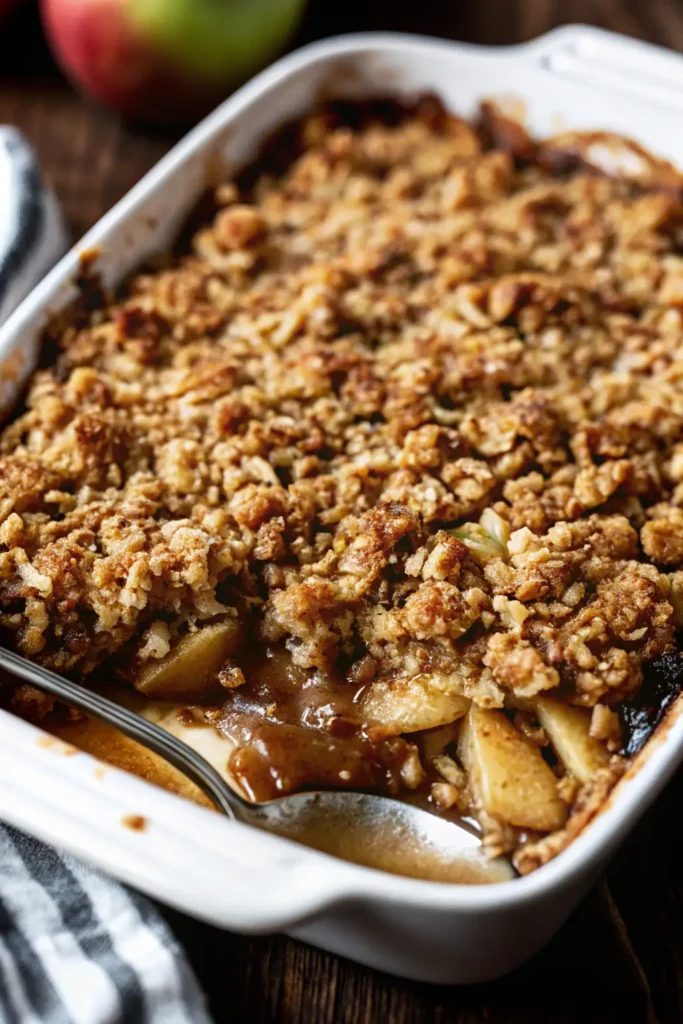
Table of Contents
Why You’ll Love This Apple Crisp
This recipe is a standout among Apple Oatmeal Dessert Recipes. It’s more than just a dessert; it’s a comforting experience that tastes like it came straight from a country kitchen.
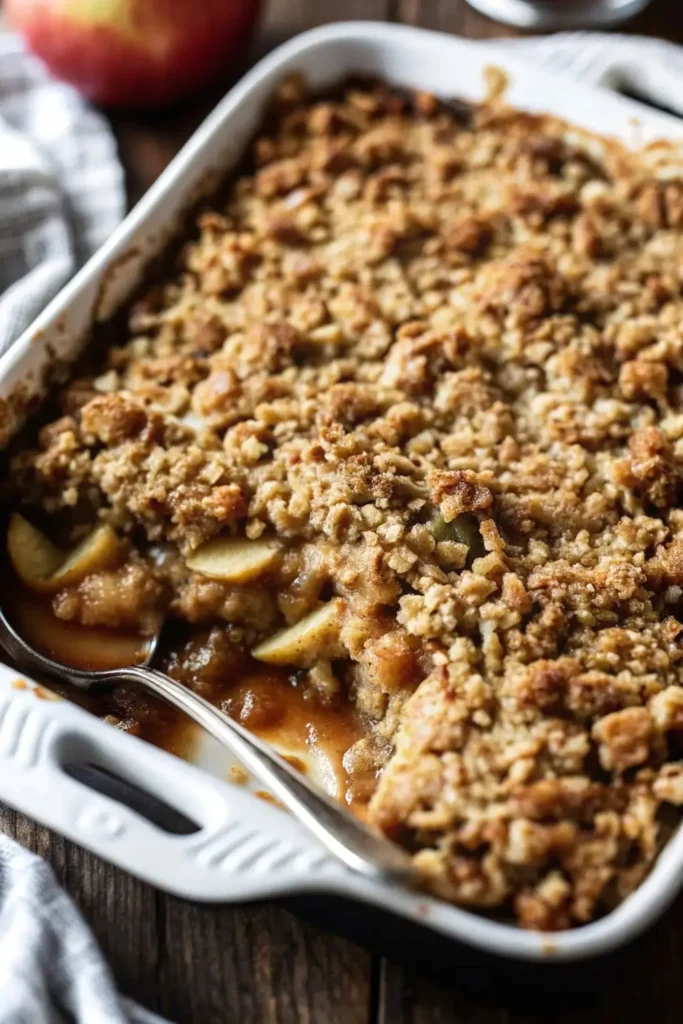
Hearty & Rustic: The thick oat topping gives this dish a wonderful, substantial crunch that you won’t find in a standard Apple Crumble Crisp. The texture contrast between the tender apples and crispy topping creates the perfect bite every time.
Deep, Rich Flavor: The combination of brown sugar, cinnamon, and tender apples creates a classic, irresistible flavor profile that embodies everything we love about fall baking. Each spoonful delivers layers of sweet, tart, and spiced notes.
Incredibly Simple: It’s a straightforward, no-fuss Homemade Apple Crisp Recipe that delivers impressive results with minimal effort. No special techniques or equipment required – just mix, top, and bake.
Budget-Friendly: Using affordable, seasonal ingredients makes this an economical dessert that feeds a crowd without breaking the bank.
Make-Ahead Friendly: Perfect for entertaining since it can be assembled in advance and baked when needed.
Naturally Wholesome: With real fruit and oats, this dessert offers more nutrition than many traditional sweets while still satisfying your sweet tooth.
Crowd-Pleasing: Appeals to all ages and dietary preferences, making it perfect for family gatherings and potluck events.
Seasonal Versatility: While perfect for fall, this recipe works beautifully year-round with different apple varieties and seasonal touches.
Your Simple Ingredient Checklist
This recipe uses classic pantry staples for a truly authentic taste. These simple, wholesome ingredients combine to create extraordinary flavors that have stood the test of time.
For the Apple Filling:
Apples: 8 medium baking apples (like Granny Smith or Honeycrisp), peeled, cored, and sliced.
Brown Sugar: ½ cup, packed.
Flour: 2 tablespoons of all-purpose flour (to thicken the filling).
Spices: 1 teaspoon of ground cinnamon.
Lemon Juice: 1 tablespoon of fresh lemon juice.
Optional: ½ cup of raisins for a classic Apple Crisp With Raisins.
For the Oat Crumble Topping:
Old-Fashioned Oats: 1 ½ cups.
All-Purpose Flour: 1 cup.
Brown Sugar: 1 cup, packed.
Salt: ½ teaspoon.
Cinnamon: 1 teaspoon of ground cinnamon.
Cold Butter: ½ cup (1 stick) of cold unsalted butter, cut into small pieces.
Ingredient Deep Dive:
Apple Selection: The foundation of any great apple crisp is choosing the right apples. Baking apples hold their shape during cooking and provide the perfect balance of sweet and tart flavors. Granny Smith apples offer tartness that balances the sweet topping, while Honeycrisp adds natural sweetness and maintains texture.
Brown Sugar Magic: Using brown sugar instead of white sugar adds molasses notes that complement the apples and create a richer, more complex flavor profile. The moisture in brown sugar also helps create that perfect gooey texture.
Old-Fashioned Oats: These larger oat flakes create the signature crispy texture that defines a true crisp. Quick oats won’t provide the same satisfying crunch and rustic appearance.
Cold Butter Technique: Cold butter is essential for creating the perfect crumbly topping. When cold butter hits the hot oven, it creates steam pockets that result in a flaky, crispy texture.
Fresh Lemon Juice: This secret ingredient brightens the apple flavor and prevents browning while adding a subtle tartness that enhances the overall taste.
Apple Variety Guide
Choosing the right apples can make or break your crisp. Here’s your guide to the best baking apples:
Best Single Varieties:
- Granny Smith: Classic tart flavor, holds shape perfectly
- Honeycrisp: Sweet with great texture retention
- Braeburn: Complex sweet-tart balance
- Golden Delicious: Mild sweetness, tender texture
- Northern Spy: Traditional baking apple with excellent flavor
Perfect Apple Combinations:
- Classic Mix: 50% Granny Smith + 50% Honeycrisp
- Complex Flavor: 40% Granny Smith + 30% Gala + 30% Braeburn
- Sweet & Tart: 60% Golden Delicious + 40% Northern Spy
Step-by-Step Instructions
Get ready to fill your home with the incredible aroma of baked apples and cinnamon. This foolproof method ensures perfect results every time.
Part 1: Prepare the Filling
Preheat and Prep: Preheat your oven to 375°F (190°C). Butter a 9×13 inch baking dish thoroughly to prevent sticking. For extra insurance, you can also lightly flour the dish after buttering.
Mix the Apples: In a large bowl, combine the sliced apples, ½ cup of brown sugar, 2 tablespoons of flour, 1 teaspoon of cinnamon, and the lemon juice. If you’re making an Apple Crisp With Raisins, add them now. Toss everything together until the apples are evenly coated. Let this mixture sit for 5-10 minutes to allow the apples to release their juices and the flavors to meld.
Arrange in Dish: Pour the apple mixture into your prepared baking dish and spread it out in an even layer. Make sure the apples are distributed evenly for consistent cooking.
Part 2: Make the Topping and Bake
Combine Dry Ingredients: In a separate medium bowl, stir together the old-fashioned oats, 1 cup of flour, 1 cup of brown sugar, salt, and 1 teaspoon of cinnamon. Mix thoroughly to ensure even distribution of all ingredients.
Cut in the Butter: Add the pieces of cold butter to the dry ingredients. Using a pastry cutter or your fingertips, cut the butter into the mixture until it resembles coarse, pea-sized crumbs. This cold butter method is key to a truly crisp topping. Don’t overwork the mixture – you want some larger butter pieces for extra flakiness.
Top the Apples: Evenly sprinkle the crumble topping over the apples in the baking dish. Make sure to cover all the fruit for even browning and cooking.
Bake to Perfection: Place the dish in the preheated oven and bake for 40-50 minutes, or until the apple filling is bubbly and tender, and the topping is a deep golden brown. You should see juices bubbling around the edges when it’s done.
Cool and Serve: Let the apple crisp cool on a wire rack for at least 20 minutes before serving. This allows the juices to set and makes serving easier. It is fantastic served warm with a scoop of vanilla ice cream, whipped cream, or a drizzle of caramel sauce.
Serving Suggestions and Accompaniments
Transform your apple crisp into a memorable dessert experience with these delicious serving ideas:
Classic Pairings:
- Vanilla Ice Cream: The cold, creamy contrast to warm crisp is unbeatable
- Fresh Whipped Cream: Light and airy, doesn’t compete with flavors
- Caramel Sauce: Adds extra sweetness and richness
- Crème Anglaise: Elegant custard sauce for special occasions
Creative Toppings:
- Cinnamon Ice Cream: Doubles down on the spice flavors
- Maple Whipped Cream: Seasonal twist on classic whipped cream
- Toasted Nuts: Chopped pecans or walnuts for extra crunch
- Sea Salt Caramel: Sweet-salty combination that’s simply divine
Beverage Pairings:
- Hot Coffee: Perfect for breakfast or afternoon treat
- Spiced Cider: Amplifies the autumn flavors
- Dessert Wine: Late-harvest Riesling or Moscato
- Hot Chocolate: Ultimate comfort combination
Storage and Make-Ahead Tips
Maximize convenience and maintain quality with these storage strategies:
Make-Ahead Options:
- Assemble and Refrigerate: Prepare completely up to 24 hours ahead, cover, and refrigerate. Bake when ready.
- Freeze Unbaked: Wrap tightly and freeze for up to 3 months. Bake directly from frozen, adding 15-20 minutes to cooking time.
- Prep Components: Slice apples and make topping separately, store in refrigerator for up to 2 days.
Storage Guidelines:
- Room Temperature: Cover and store for up to 2 days
- Refrigerated: Covered storage for up to 5 days
- Frozen: Baked crisp freezes for up to 3 months
Reheating Instructions:
- Oven Method: 350°F for 15-20 minutes until heated through
- Microwave: Individual portions for 45-60 seconds
- Toaster Oven: Small portions for 10-15 minutes
Seasonal Variations and Flavor Twists
Keep your apple crisp exciting with these delicious variations:
Fruit Combinations:
- Apple-Cranberry: Add 1 cup fresh or dried cranberries
- Apple-Pear: Replace 2 apples with 2 pears for complexity
- Apple-Berry: Fold in 1 cup mixed berries for color and tartness
Spice Variations:
- Warm Spice Blend: Add nutmeg, allspice, and cardamom
- Maple Cinnamon: Replace some brown sugar with maple syrup
- Chai-Spiced: Include ginger, cloves, and black pepper
Topping Upgrades:
- Nutty Crunch: Add chopped pecans or walnuts to topping
- Coconut Crisp: Include shredded coconut in the oat mixture
- Protein Boost: Add chopped almonds and pumpkin seeds
Nutritional Benefits
While indulgent, this apple crisp offers some nutritional advantages:
Health Highlights:
- Fiber: Apples and oats provide digestive benefits
- Antioxidants: Apples contain quercetin and other beneficial compounds
- Whole Grains: Oats contribute heart-healthy beta-glucan
- Potassium: Apples support heart health and muscle function
- Vitamin C: Fresh apples provide immune system support
Lighter Modifications:
Serve smaller portions with Greek yogurt instead of ice cream
Reduce sugar by 25% for a less sweet version
Use coconut oil instead of butter for different fat profile
Add chopped nuts for healthy fats and protein

Pioneer Woman-Style Apple Crisp
Equipment
- 9×13-inch baking dish
- Mixing bowls
- Pastry cutter or fingertips
- Measuring Cups and Spoons
Ingredients
- 8 medium baking apples (Granny Smith or Honeycrisp), peeled, cored, and sliced
- 0.5 cup brown sugar, packed
- 2 tbsp all-purpose flour
- 1 tsp ground cinnamon
- 1 tbsp fresh lemon juice
- 0.5 cup raisins (optional)
- 1.5 cups old-fashioned oats
- 1 cup all-purpose flour
- 1 cup brown sugar, packed
- 0.5 tsp salt
- 1 tsp ground cinnamon
- 0.5 cup cold unsalted butter, cut into pieces
Instructions
- Preheat oven to 375°F (190°C). Butter a 9×13 inch baking dish.
- In a large bowl, toss sliced apples with brown sugar, flour, cinnamon, and lemon juice. Add raisins if using.
- Spread the apple mixture evenly in the prepared baking dish.
- In another bowl, mix oats, flour, brown sugar, salt, and cinnamon. Cut in the cold butter until the mixture resembles coarse crumbs.
- Sprinkle topping evenly over the apple mixture.
- Bake for 40–50 minutes, until apples are tender and topping is golden brown.
- Cool for 20 minutes before serving warm with vanilla ice cream.
Notes
Frequently Asked Questions (FAQ)
1. Can I make this Apple Crisp from frozen apples? Yes, you can make an Apple Crisp From Frozen Apples! There is no need to thaw them first. Simply toss the frozen apple slices with the filling ingredients and proceed with the recipe. You may need to add about 10-15 minutes to the total baking time to ensure the apples are cooked through and bubbly. The texture will be slightly different but still delicious.
2. What are the best apples for this Easy Crisp Recipe? The best apples are firm ones that hold their shape during baking. A tart apple like Granny Smith provides a wonderful flavor contrast to the sweet topping. Other great options include Honeycrisp, Braeburn, and Golden Delicious. Using a mix of sweet and tart apples is a great way to get a complex flavor profile that’s not too sweet or too tart.
3. What’s the difference between an Apple Crumble Crisp and a regular crisp? The terms are often used interchangeably, but traditionally, a crisp contains oats in the topping, giving it a heartier, more “crisp” texture. An apple crumble topping is typically a simpler mixture of flour, sugar, and butter, resulting in a more sandy or crumbly texture. This recipe is a true crisp because of its generous amount of oats that create that signature crunchy texture.
4. How do I store and reheat leftovers of this Homemade Apple Crisp Recipe? Store any leftover apple crisp covered in the refrigerator for up to 4-5 days. To reheat, you can warm individual portions in the microwave for about 45-60 seconds. For the best results and to re-crisp the topping, reheat it in an oven at 350°F (175°C) for 15-20 minutes until heated through and the topping regains its crunch.
5. Can I make this recipe gluten-free? Yes! Simply substitute the all-purpose flour with a 1:1 gluten-free flour blend both in the filling and the topping. Make sure your oats are certified gluten-free as well. The texture will be very similar to the original recipe.
6. Why is my apple crisp topping not crispy? Several factors can affect crispiness: using warm butter instead of cold, overmixing the topping, or underbaking. Make sure your butter is cold, mix just until combined, and bake until the topping is deep golden brown and the filling is bubbling.
7. Can I double this recipe? Absolutely! Double all ingredients and use a larger baking dish or two 9×13 pans. The baking time may increase by 10-15 minutes, so watch for bubbling edges and golden brown topping.
8. How do I prevent my apples from getting mushy? Choose firm baking apples, don’t over-slice them (aim for ¼-inch thick slices), and avoid overbaking. The apples should be tender but still hold their shape when done.
9. Can I make individual servings? Yes! Divide the mixture among 6-8 ramekins and reduce the baking time to 25-30 minutes. Individual servings are perfect for portion control and elegant presentation.
10. What if I don’t have brown sugar? You can substitute white sugar, but the flavor will be less complex. For a closer match, add 1 tablespoon of molasses to white sugar, or use coconut sugar as an alternative.
Troubleshooting Common Issues
Problem: Soggy bottom crust
Solution: Make sure your baking dish isn’t too deep, and don’t skip the flour in the apple mixture – it helps absorb excess juices.
Problem: Burnt topping, undercooked apples
Solution: Cover with foil if browning too quickly, and cut apples into more uniform pieces for even cooking.
Problem: Not sweet enough
Solution: Different apple varieties have varying sweetness levels. Taste your apple mixture and adjust sugar accordingly.
Problem: Too sweet
Solution: Add an extra tablespoon of lemon juice to balance the sweetness, or use more tart apples next time.
Conclusion
This Pioneer Woman-style apple crisp represents everything wonderful about homestyle baking – simple ingredients, foolproof techniques, and results that bring people together. Whether you’re carrying on family traditions, creating new memories, or simply treating yourself to something special, this recipe delivers comfort and satisfaction in every bite.
The beauty of this dessert lies in its versatility and forgiving nature. You can adapt it to your taste preferences, dietary needs, and seasonal availability while always maintaining that essential character that makes apple crisp such a beloved classic. From the first fragrant whiff as it bakes to the last satisfying spoonful, this apple crisp embodies the very essence of comfort food.
So gather your apples, preheat your oven, and prepare to fill your home with the irresistible aroma of cinnamon and brown sugar. Your family and friends will be asking for this recipe – and you’ll be happy to share this slice of homestyle heaven.